DNS prefetching allows you to resolve domain names (perform a DNS lookup in the background) before a user clicks on a link, which in turn can help improve performance. It is done by adding a rel=”dns-prefetch” tag in the header of your WordPress site.
<link rel="dns-prefetch" href="//domain.com">
Some common things to use DNS prefetching for is your CDN URL, Google fonts, Google Analytics or Google Tag Manager, etc.
 <link rel="dns-prefetch" href="//cdn.domain.com">
 <link rel="dns-prefetch" href="//fonts.googleapis.com">
 <link rel="dns-prefetch" href="//www.google-analytics.com">
 <link rel="dns-prefetch" href="//www.googletagmanager.com">
Enable DNS prefetching in WordPress
DNS-prefetch is supported by all major browsers, except for iOS Safari, Opera Mini, and Android Browser. Note: Firefox only supports dns-prefetch on HTTP origins.
To implement DNS prefetching follow the steps below.
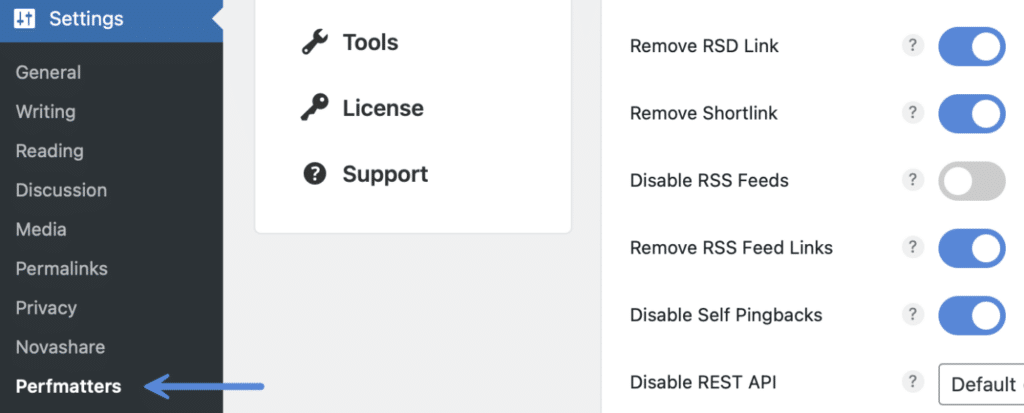
Step 1
Click into the Perfmatters plugin settings.

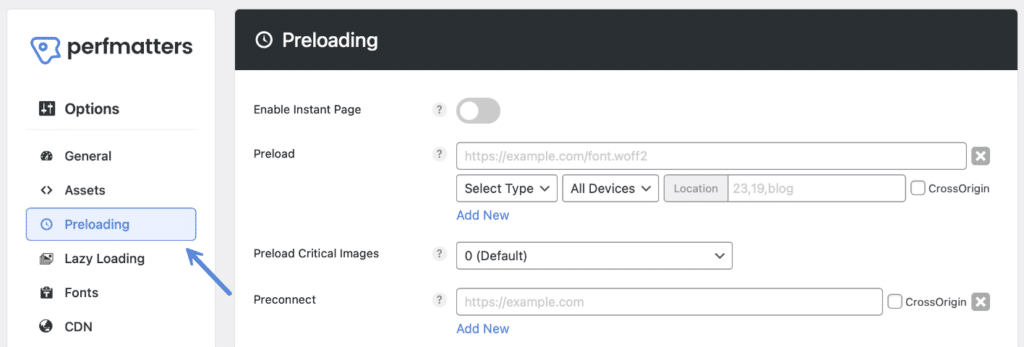
Step 2
Click on the “Preloading” submenu.

Step 3
Under “DNS Prefetch,” add your domains (one per line). Don’t add the http:// or https://, this way it will resolve no matter the protocol.

Also, some themes might add DNS prefetching for certain things like Google Fonts already. You might want to view your source code and do a quick scan just to ensure you aren’t trying to add the tag twice.
Step 4
Scroll down and click “Save Changes.”