Preconnect allows the browser to set up early connections before an HTTP request, eliminating round-trip latency and saving time for users.
“Preconnect is an important tool in your optimization toolbox… it can eliminate many costly roundtrips from your request path – in some cases reducing the request latency by hundreds and even thousands of milliseconds. – lya Grigorik“
A few examples of things you might want to utilize this for include your CDN URL or Google Fonts.
 <link rel="preconnect" href="https://cdn.domain.com">
 <link rel="preconnect" href="https://fonts.gstatic.com">
Here are some additional resources to read up more in-depth about preconnect and how it can help your WordPress site:
Enable preconnect in WordPress
Preconnect is supported by most modern browsers, with the exception of Internet Explorer (Microsoft Edge supports it) and Opera Mini.
To implement preconnect, follow the steps below.
Step 1
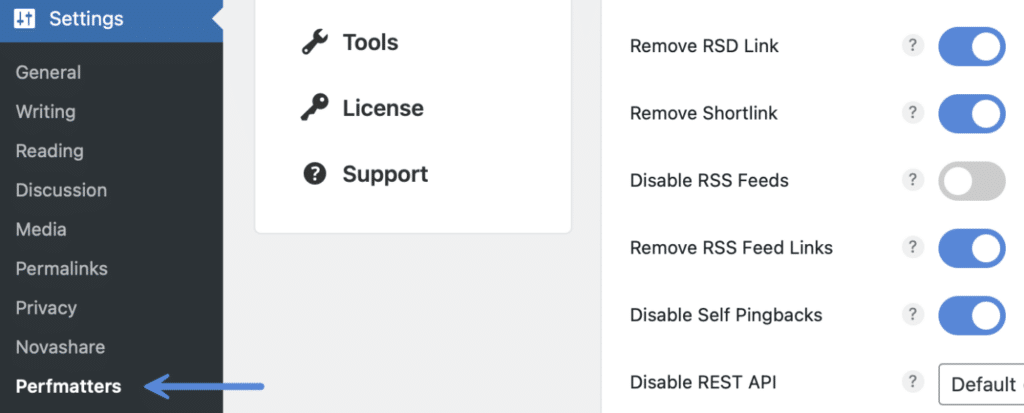
Click into the Perfmatters plugin settings.

Step 2
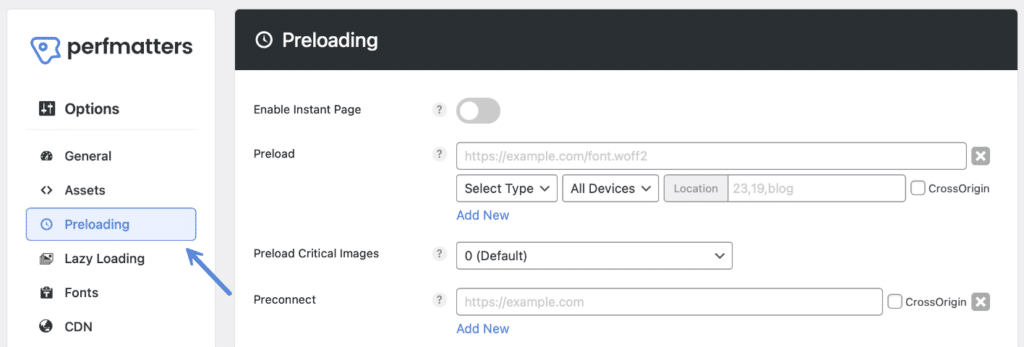
Click on the “Preloading” submenu.

Step 3
Under “Preconnect” add your domains, one per line. Format: scheme://domain.tld (one per line).

You don’t need fonts.googleapis.com under Preconnect. Why? Because fonts.gstatic.com and fonts.googleapis.com are directly related. Google always serves its fonts from fonts.gstatic.com, and therefore you want to preconnect to that domain while it is loading the CSS from fonts.googleapis.com.
Step 4
Scroll down and click “Save Changes.”
CrossOrigin
The CrossOrigin setting is only used in some very unique setups. In 99% of cases, you won’t need to check this option.
Testing preconnect
Here is a helpful article from Andy Davies on how to check if rel=preconnect resource hints are working.
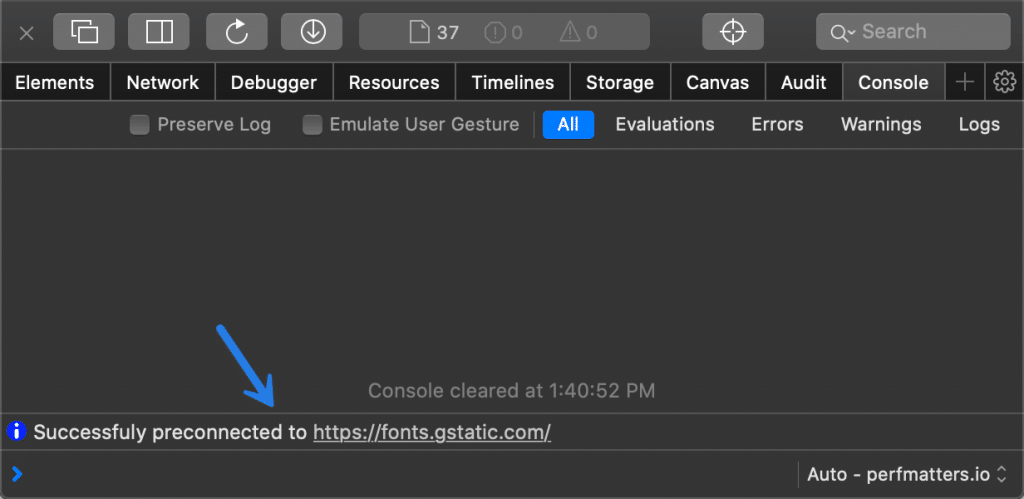
The easiest way as Andy mentions is to simply use Mac’s Safari browser. In the Web Inspector tool, in the Console, you can see status messages in regards to preconnect.
