You can now add code snippets in Perfmatters, including PHP, CSS, JS, and HTML. We built it from the ground up with performance in mind. It uses a flat-file approach, which means it is more secure and there are zero database calls on the front-end. In other words, it’s incredibly fast and won’t negatively impact page load times.
In our testing, we saw ~20.5% less execution time on the backend. Our codebase is also incredibly lightweight (~75% less code than other solutions), as we aren’t focused on syncing, cloud, features you’ll never use, etc. Our goal is blazing-fast loading code snippets.
We took it a step further and made all the performance options you already use and love in Perfmatters available at the individual snippet level. Optimization features include loading snippets in a file or inline, minification, delay on user interaction, preloading, defer, async, and more.
We also have built-in error checking, meaning it’s not possible to break your site. If an error is detected with a snippet, it will automatically be deactivated. We auto-recover from fatal errors better than other solutions.
Use our conditions builder to only load your code snippets where they are needed. There are an unlimited number of rules you can configure. Add includes, excludes, and even load by role or status (logged-in or logged-out).
Already have another code snippet solution installed? You can now get rid of another plugin and utilize Perfmatters for everything.
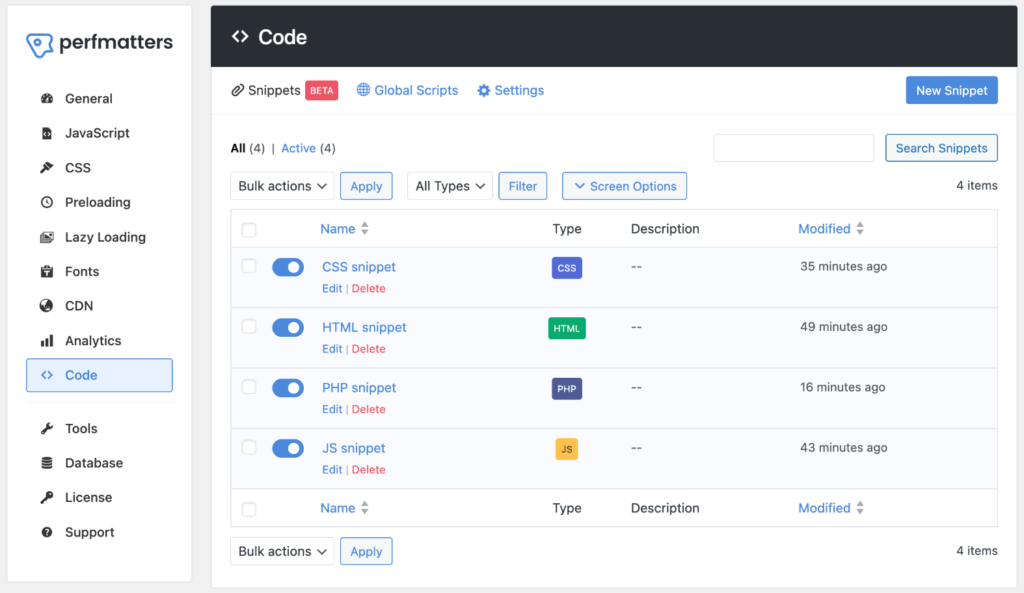
How to add a code snippet
Follow the steps below to add a code snippet to your WordPress site.
This feature is currently in BETA. If you run into any issues, please reach out to us. We’re always eager to make improvements or fix any bugs.
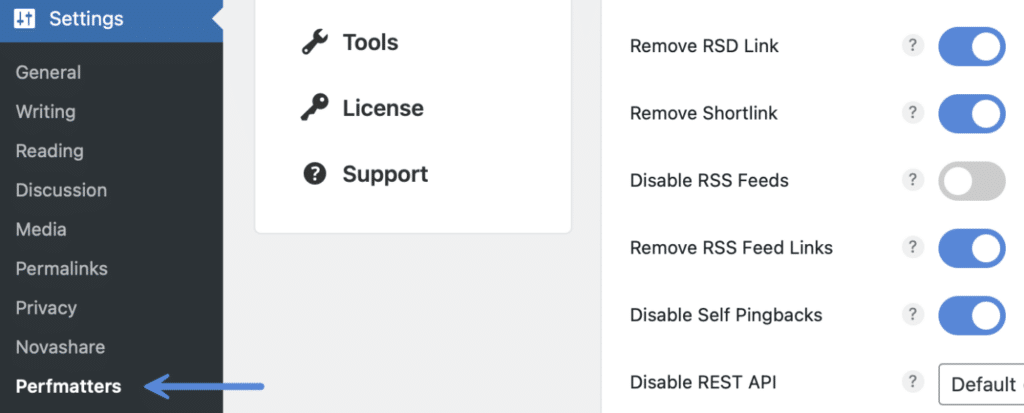
Step 1
Click into the Perfmatters plugin settings.
Step 2
Click on the “Code” menu.
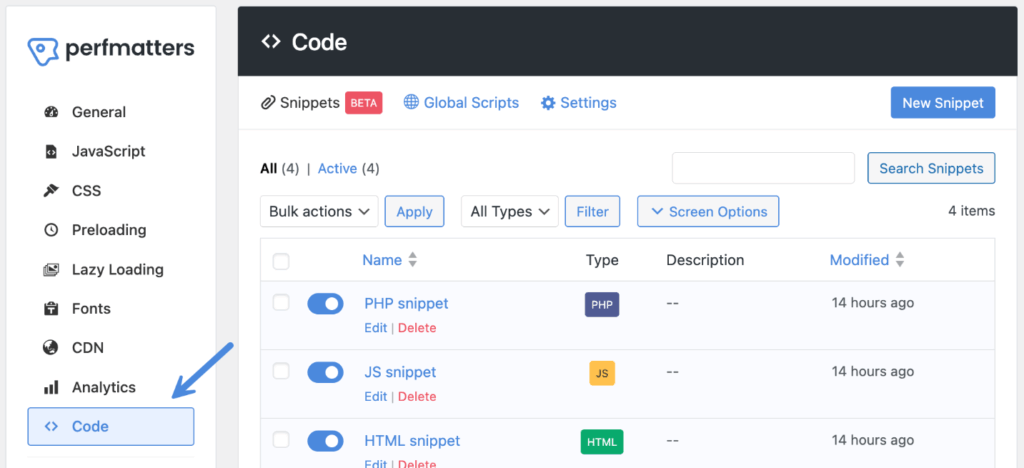
Step 3
Click on “New Snippet” in the header.

Step 4
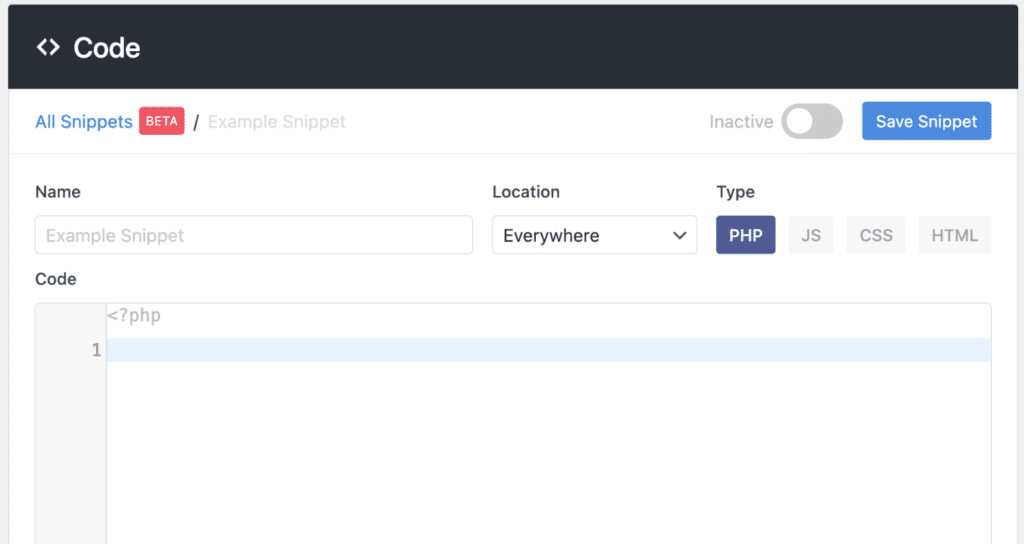
On the individual snippet page, give your snippet a name and choose the type of snippet (PHP, JS, CSS, or HTML). You can then choose from other options such as location, priority, optimizations, conditions, tags, and description.
Enter your code in the “Code” box.
Step 5
If you want the snippet to run right away, toggle on “Active” and click “Save Snippet.” Otherwise, you can leave the snippet inactive and click “Save Snippet.”

Location
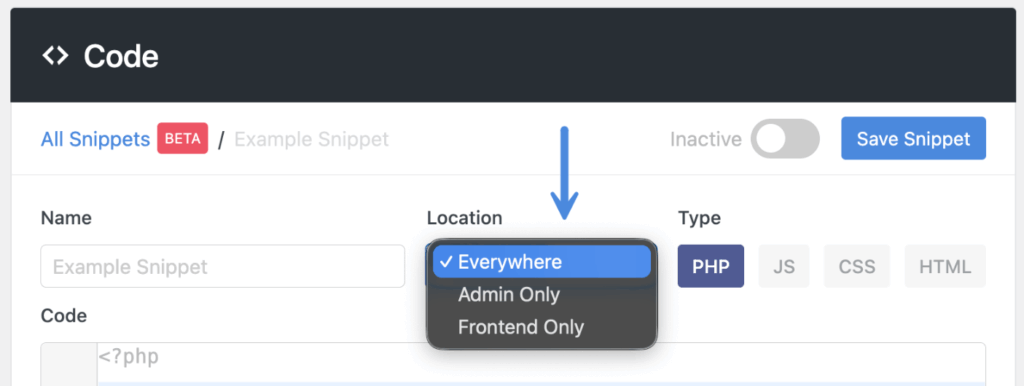
The location is where your code will run, and this will vary based on the type of snippet.
PHP snippets
PHP snippets have three locations:
- Everywhere (default)
- Frontend only
- Admin only
JS snippets
JS snippets have four locations:
- Frontend header (default)
- Frontend footer
- Admin header
- Admin footer
CSS snippets
CSS snippets have four locations:
- Frontend header (default)
- Frontend footer
- Admin header
- Admin footer
HTML snippets
HTML snippets have five locations:
- Frontend header (default)
- Frontend body
- Frontend footer
- Before content
- After content
If you need more advanced rules, you can also use conditions.
Priority
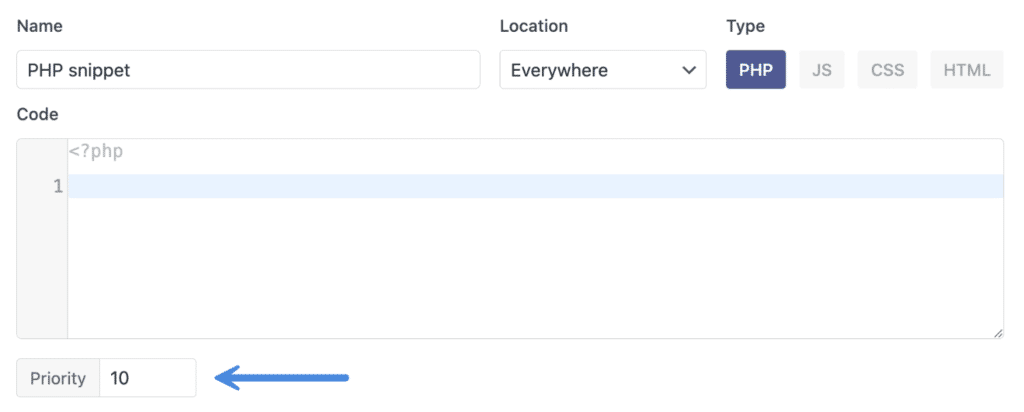
The priority defines the order in which the code runs. By default, all code snippets have a priority of 10.
Many times, you won’t need to change this, but it’s there if you need the code to run sooner. For example, if you set the priority to 1, it will run before other snippets with a lower priority (10). Both zero and negative values are also accepted.
Optimizations
Optimizations let you fine-tune how the JS and CSS code snippet loads to boost performance. Many of the features you might already be used to in Perfmatters are now available at the individual snippet level. The optimizations available will vary depending on the code snippet type.
You can also enable optimizations simultaneously (if they support it). For example, perhaps you want to minify your CSS code snippet and also load it as a file asynchronously.
Note: Global optimizations in the other areas of Perfmatters don’t impact code snippets. This is intentional, to give you full control over optimizations at the snippet level.
Print method (JS, CSS)
The print method determines whether the code is loaded inline or as a separate file.
Inline
The inline print method is the default. This means your snippet will load as part of the HTML page. It will contain pmcs (Perfmatters code snippets), followed by your snippet file name, followed by the type of snippet. Example:
<script id="pmcs-snippetname-js">test</script>One advantage of this method is that your code won’t be render-blocking. However, one disadvantage is that it can add to the size of your HTML page and can rely more on edge cache (as it’s not cached separately). We typically recommend this for smaller to medium-sized code snippets.

File
The file method will load your snippet in a file. It will contain your snippet file name, followed by the version string. Example:
snippetname.js?ver=xxxxxxxxxOne advantage of this method is that your code snippet can be more easily cached, as cache plugins and CDNs typically have longer cache lengths set on assets (JS, CSS). This can result in faster load times.

Load behavior (JS, CSS)
The load behavior allows you to further change how your snippet loads for better performance.
Preload (JS, CSS)
Preload allows you to specify that the snippet needs to load right away or very soon during a page load. Essentially it will bump it the top of the waterfall and make it not render-blocking. This is done by adding a link tag with a rel="preload" attribute for the snippet to the head of the document.

Defer (JS)
Defer means the JavaScript is downloaded during the browser’s HTML parsing and will execute after the page has finished loading. Think of it like pushing all the JavaScript to the bottom of the waterfall. It will make it not render-blocking. This is done by adding a defer attribute to the snippet. You can defer JS in both the “Inline” and “File” print methods.

Delay (JS)
Delay allows you to delay JavaScript from loading until user interaction. This can be a great way to significantly speed up load times when something isn’t needed right away. You can delay JavaScript in both the “Inline” and “File” print methods.

Async (CSS)
Async allows you to optimize your CSS snippets by executing them asynchronously as the page loads, making them not render-blocking. This is done by adding an onload attribute to the snippet.

Minify (JS, CSS)
Minification is the process of removing unnecessary characters from your code (whitespace, comments, shortening function and variable names, etc.), along with additional markup cleanup. This reduces the overall size of the file and parsing time. You can minify your JavaScript and CSS code snippets in both “Inline” and “File” print methods.

Conditions
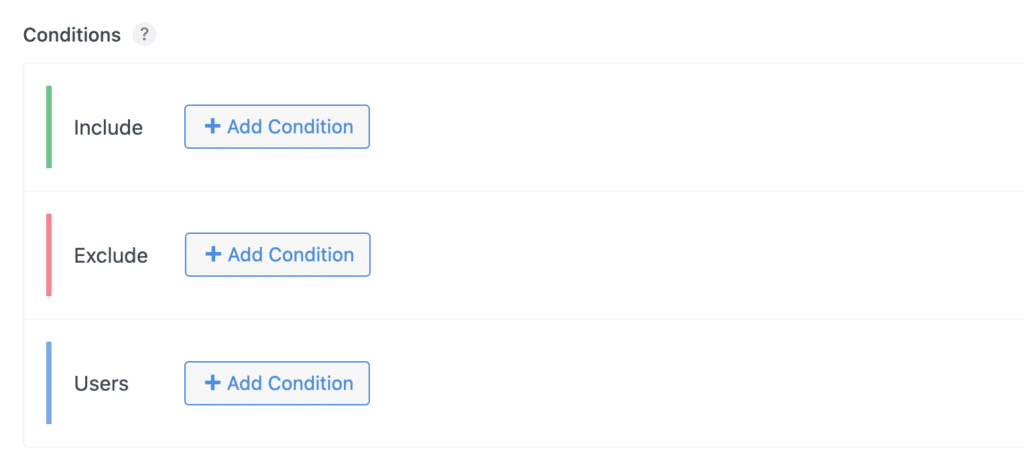
You can use the Perfmatters conditions builder to only load your code snippets where they are needed. There are an unlimited number of rules you can configure.
Includes
By default, your code snippet will only use the location option. However, if you need more control, you can specify where it should run.
Excludes
Excludes can be added for where a code snippet shouldn’t run. However, many times this won’t be needed if you’ve already specified where it should run with an Include.
Users
Users allows you to choose the role (administrator, editor, etc.) or status (logged-in versus logged-out) for which the code snippet should run.
Example
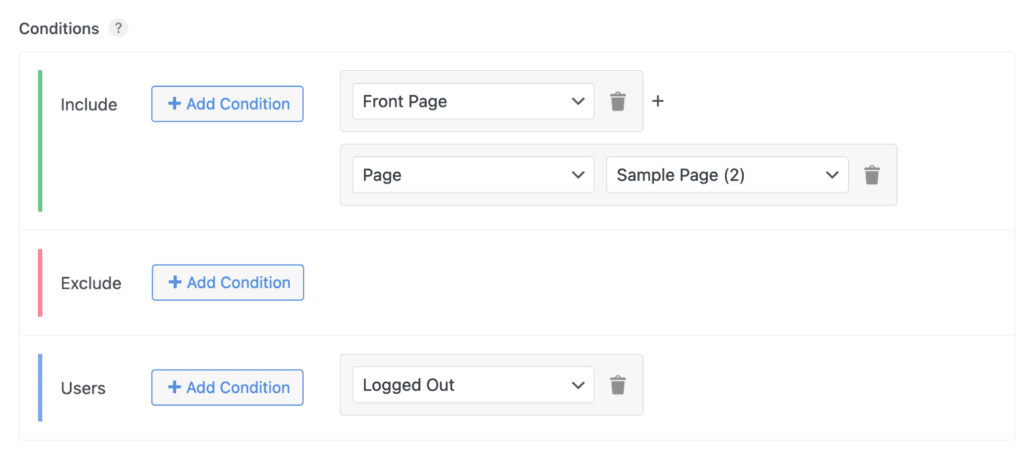
For example, perhaps you have a CSS code snippet that you want to only load on specific pages, and only show when logged out. You can keep clicking “Add Condition” as needed for additional rules.
Tags
You can add tags to your code snippets to more easily identify and find them on the main snippets page. If you have a lot of snippets, you can also search for a snippet by the tag name.

Description
You can add a description to your code snippets to more easily identify their purpose. This is often used for short notes. You can also search for a snippet by the description.

Screen options
Screen options allow you to modify the default columns shown on the Code Snippets page. To change the columns, click on “Screen Options.”
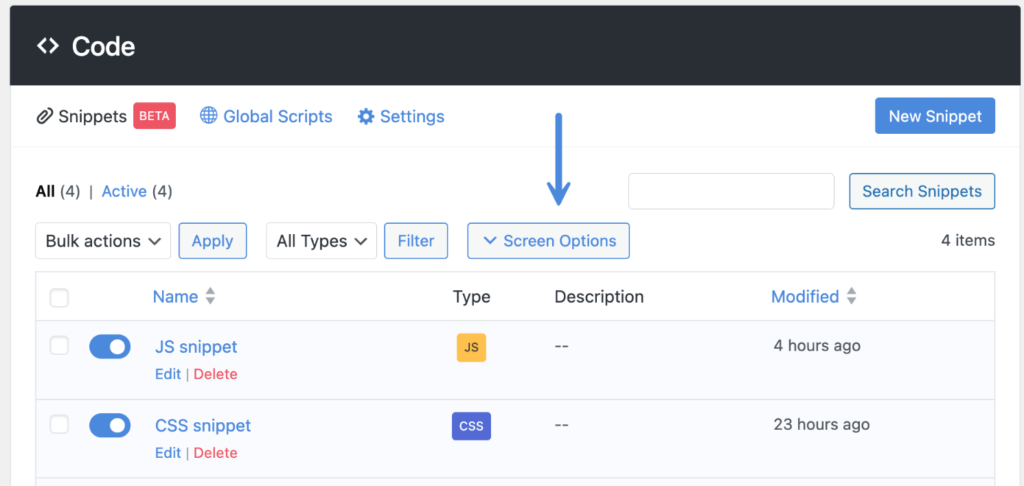
The defaults shown are Type, Description, and Modified. You can enable Tags, Author, Created, and Priority. You can also change the number of code snippets that show per page.

Safe mode
Safe mode is a feature that can be used in case you run into issues that aren’t automatically recovered. It prevents code snippets from running regardless of active status.
There are three different ways to enable safe mode:
- Enable safe mode via settings
- Enable safe mode via recovery URL
- Enable safe mode via wp-config.php consant
Enable safe mode via settings
Step 1
Click into the Perfmatters plugin settings.

Step 2
Click on the “Code” menu.

Step 3
Click on the “Settings” menu.
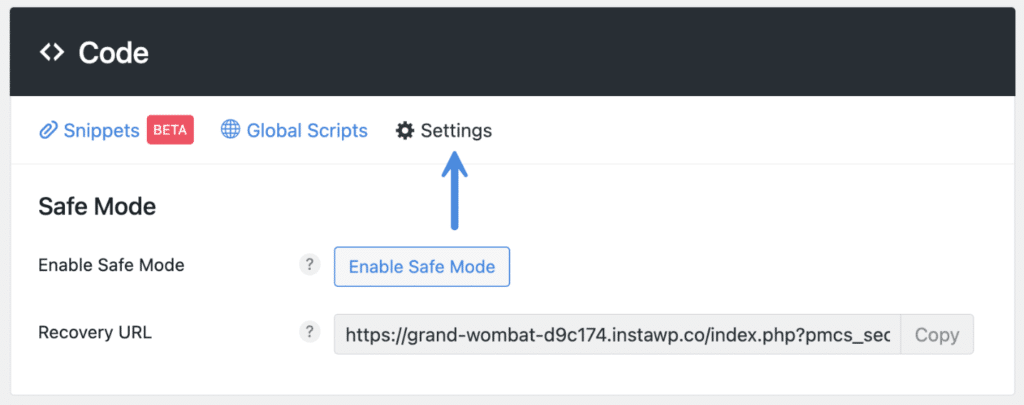
Step 4
Click on “Enable Safe Mode.”
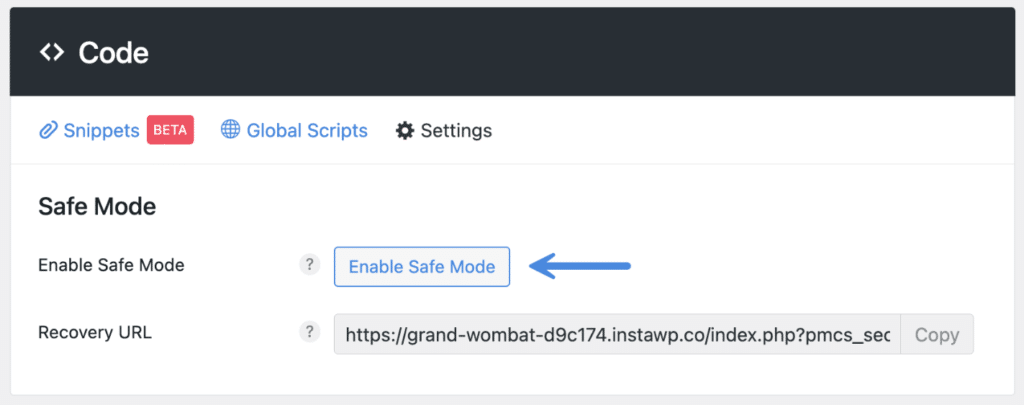
You will see a notification across the code snippets screens to disable safe mode. You can also revisit the settings page and disable it from there if needed.

Enable safe mode via recovery URL
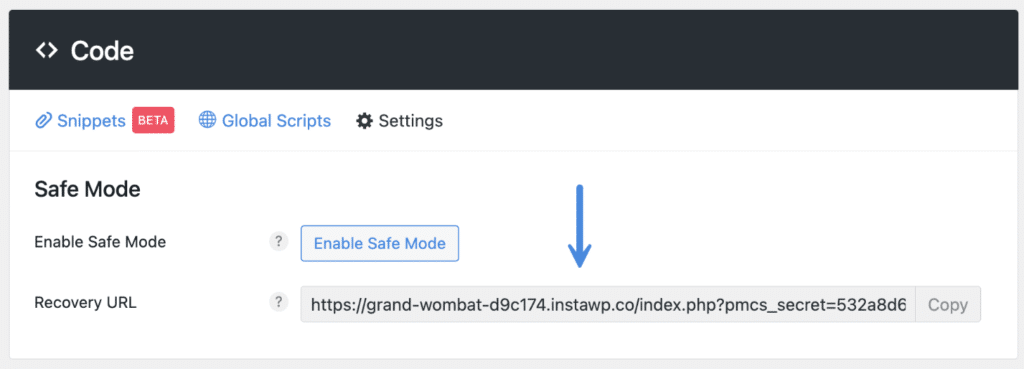
Another way to enable safe mode is using the recovery URL. After you make your first code snippet, a unique recovery URL is generated. You can copy and store this somewhere safe if needed. You can visit this URL to enable safe mode in the event of an unrecoverable snippet error.
Enable safe mode via wp-config.php constant
You can use the PMCS_SAFE_MODEwp-config.php file.
define('PMCS_SAFE_MODE', true );This will typically go beneath the WP_DEBUG constant.

wp-config.php constantNote: You will not be able to disable safe mode via the regular methods when using the PMCS_SAFE_MODE constant. It must be removed from the wp-config.php file.
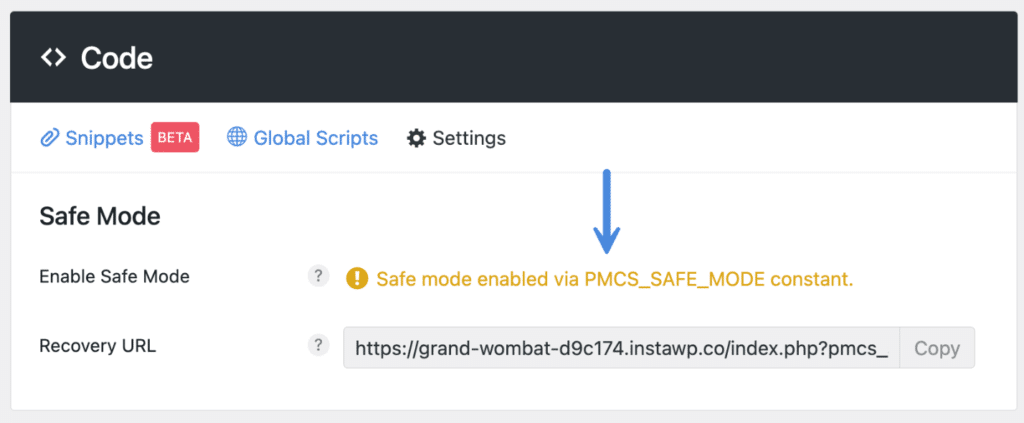
PMCS_SAFE_MODE)How to export code snippets
You can export your Perfmatters code snippets as a .json file. This lets you easily import the configuration into another WordPress site using Perfmatters.
There are a three different ways to export code snippets:
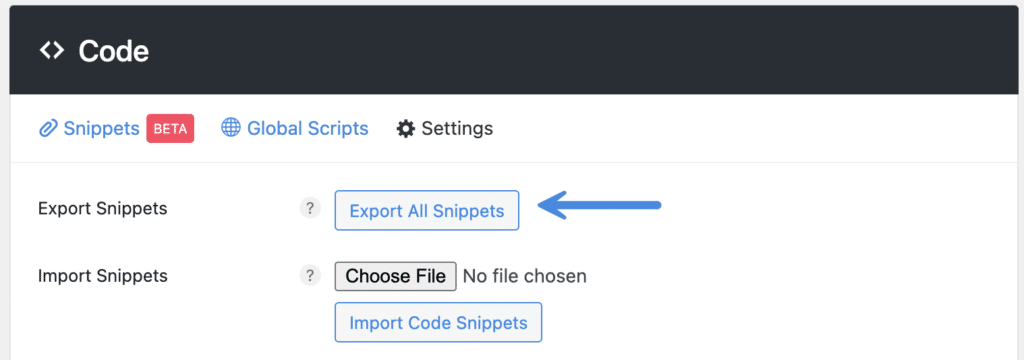
Export all snippets
Under the “Settings” menu, click on “Export All Snippets.” This exports all code snippets as .json file. File format: perfmatters-snippets-export-yyyy-mm-dd.json
Individual snippet export
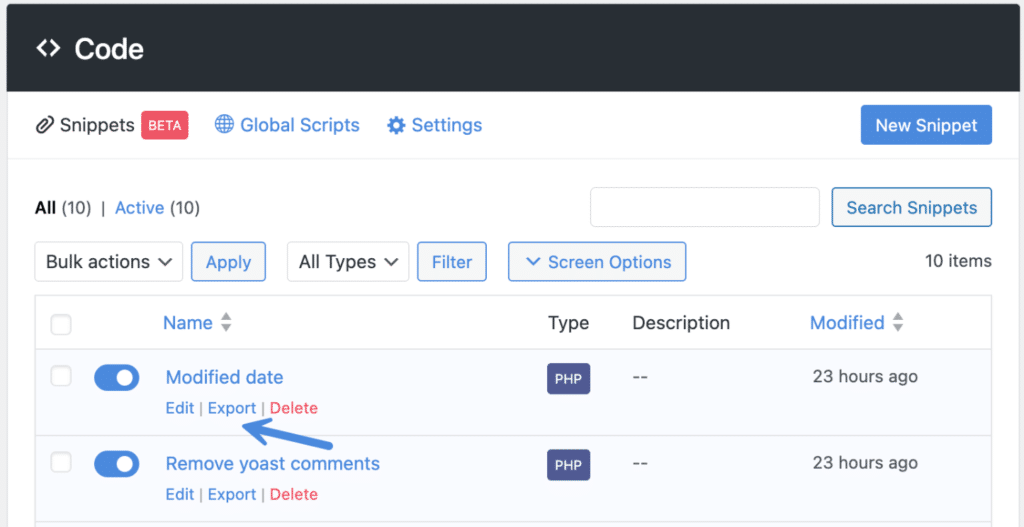
To export an individual code snippet, click on the “Export” link underneath each snippet. This exports the individual code snippet as .json file. File format: perfmatters-snippet-name-yyyy-mm-dd.json
Bulk export snippets
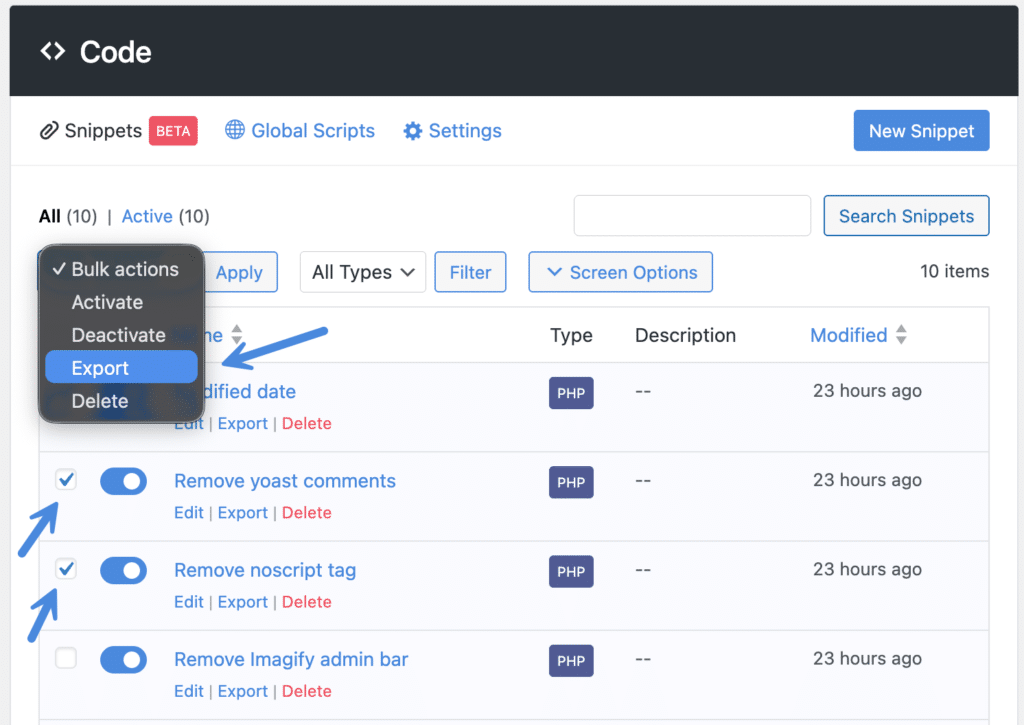
To bulk export code snippets, select the snippets you want to export. Click on the “Bulk actions” dropdown and select “Export.” Then click “Apply.” This exports all selected code snippet as .json file. File format: perfmatters-snippets-bulk-export-yyyy-mm-dd.json
How to import code snippets
You can import your sitewide snippets, individual snippets, and bulk snippets.
Note: Currently, we only support importing snippets generated and exported with Perfmatters. We don’t support importing snippets from third-party solutions yet (WPCode, Code Snippets, etc.); we are working on adding this feature.
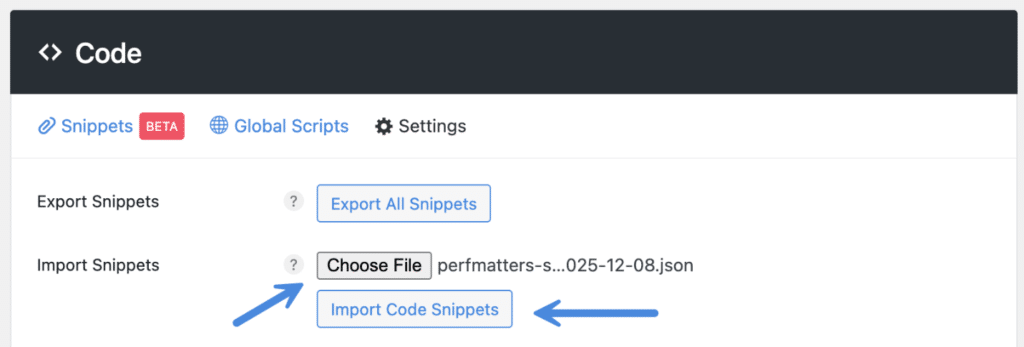
Under the “Settings” menu, click on the “Choose File” button. Find and select your exported .json file. Then click on the “Import Code Snippets” button.
How to disable access to code snippets
There might be situations where you don’t want clients to have access to add code to their WordPress site.
You can use the PERFMATTERS_DISABLE_CODEwp-config.php file.
define('PERFMATTERS_DISABLE_CODE', true);This will typically go beneath the WP_DEBUG constant.

Troubleshooting
Our code snippet feature has built-in error checking, meaning it shouldn’t be possible to break your site. If an error is detected with a snippet, it will automatically be deactivated.
However, if you are trying to troubleshoot an issue that you think is coming from a code snippet, you can use safe mode. This can be an easy way to globally rule them out, without having to toggle off snippets individually. Think of it like using our query strings in Perfmatters to temporarily disable optimization features.
If you are encountering any issues with adding code snippets, please contact us. This is feature is in beta and we’re always eager to make improvements or fix any bugs that might arise.