We have clients that utilize all sorts of different optimization and caching solutions alongside Perfmatters. Our plugin is entirely modular by design, meaning it’s easy to use only the features you want. Below, we’ll dive into the settings that we personally recommend when using Perfmatters and LiteSpeed Cache together to improve server response time (TTFB).
LiteSpeed Cache settings
If your WordPress site is hosted on a LiteSpeed server, then we always recommend utilizing the free LiteSpeed Cache plugin. It works really well with their server environment in terms of cache and is well supported.
For a quick and basic setup, we usually recommend turning everything off in LiteSpeed Cache except for the cache features and letting Perfmatters handle all the front-end code optimizations.
Guest Mode and Guest Optimization
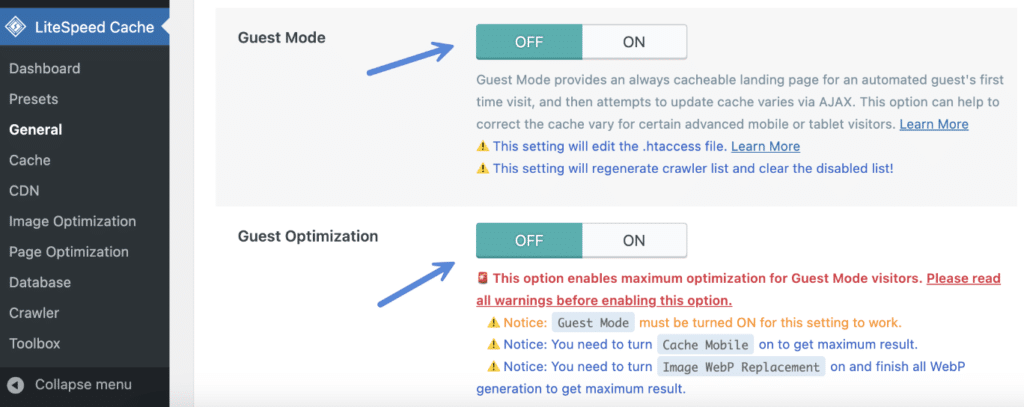
Under “LiteSpeed Cache → General,” turn off both Guest Mode and Guest Optimization. These will interfere with Perfmatters.
Page optimization
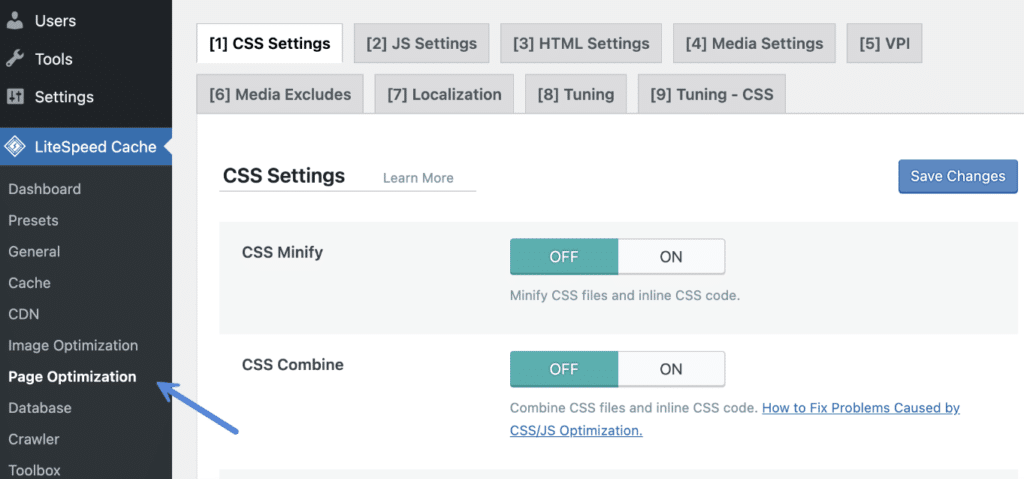
Under “Page Optimization,” turn off every setting. Also, it’s OK to mix and match features as long as you aren’t duplicating what is already running in Perfmatters. However, for most clients, we recommend turning off all page optimization features and letting Perfmatters handle the front-end assets.
For HTML minification, you can decrease the total size of the page. But we typically only recommend enabling this if you are using a very long cache length and have extremely large pages (in terms of HTML size). If you have a fairly well-optimized site or one that is dynamic, it might be better to leave this off.
Cache
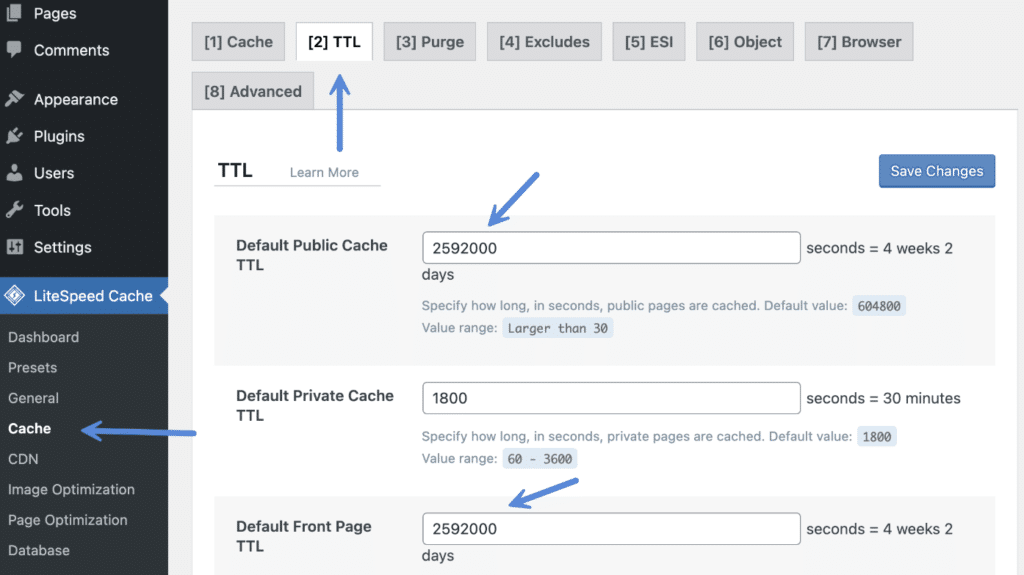
Under the “TTL” tab, we recommend settings your default public cache and default front page cache to 1 month (2592000 seconds). This will help decrease your TTFB. The longer visitors hit cache, the better. This might vary based on what type of site you’re running, but remember that when you publish new content, LiteSpeed automatically purges certain areas. So you don’t always need to worry that new content won’t show up.
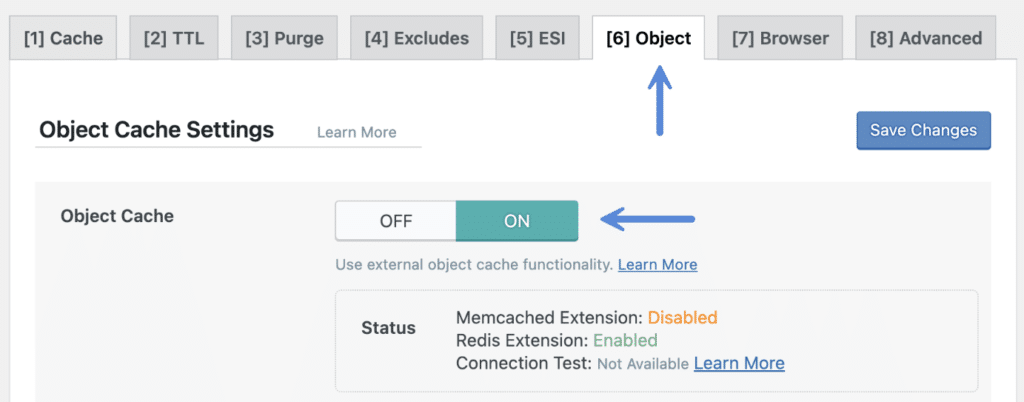
Under the “Object” tab, enable the “Object Cache” feature. Depending on your host, you might want to enable or configure their Memcached or Redis integrations.
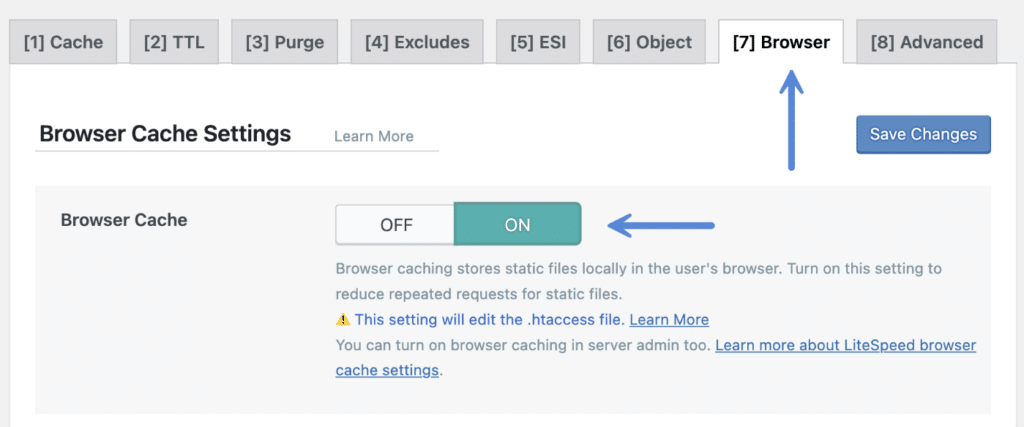
Under the “Browser” tab, enable the “Browser Cache” feature.
CDN
You have a few different options when it comes to a content delivery network (CDN).
Cloudflare APO
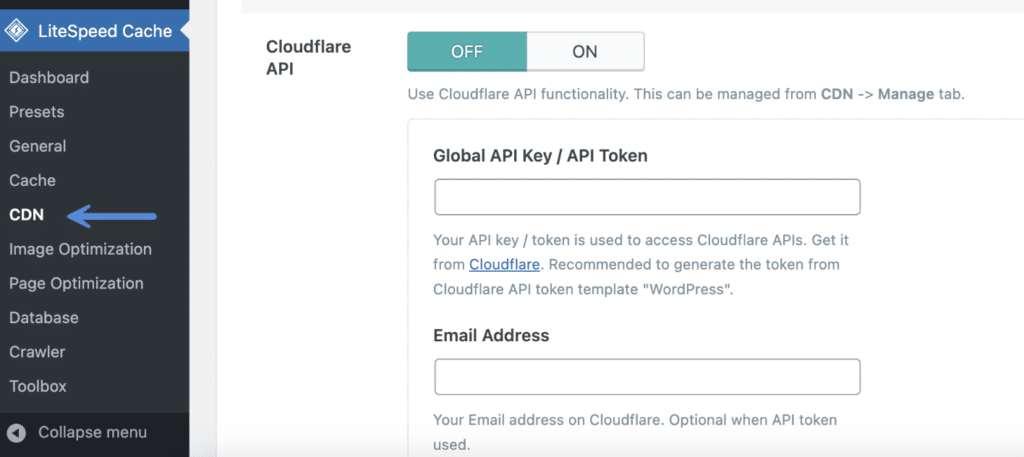
We really like Cloudflare APO. However, the one downfall is that LiteSpeed Cache doesn’t technically talk to Cloudflare APO. So you will have to separate layers of cache. We’ve worked on many sites using both with no issues; it just means you might need to purge both layers of cache. However, you can hook up your Cloudflare account in LiteSpeed cache under the “CDN” menu.
QUIC.cloud
Another option is to use QUIC.cloud. This will do something similar to Cloudflare APO, but is designed specifically with LiteSpeed Cache in mind. We personally prefer Cloudflare ourselves, but always use whatever works best for your site. You might even want to test both options.
To set this up, enable the QUIC.cloud CDN feature and configure your account under the “QUIC.cloud CDN Setup” tab.

Traditional 3rd-party
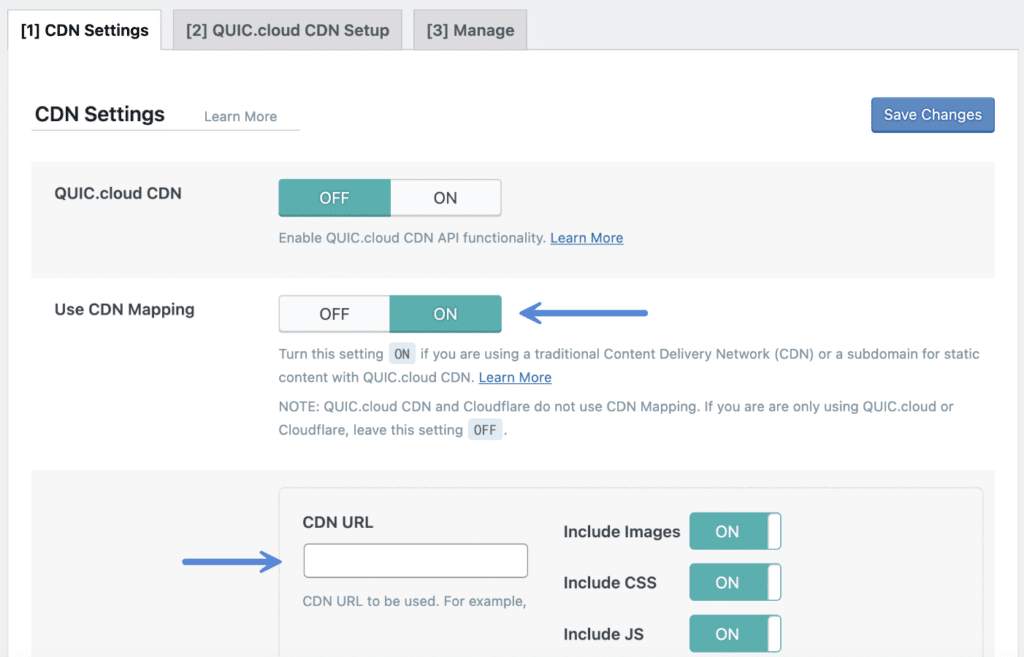
If you aren’t using one of the above methods, you can use a traditional 3rd-party CDN like KeyCDN or Bunny with a custom CDN URL (cdn.domain.com). However, we prefer one of the methods above as you will get the benefit of full page edge cache instead of just caching your assets. But you can setup CDN mapping in LiteSpeed Cache if needed. You can also do this in Perfmatters as well.
If you run into any issues configuring LiteSpeed Cache alongside Perfmatters, please reach out to us. We’re always happy to help.
Using other LiteSpeed Cache features
Everything is pretty modular in both plugins, so you can use certain features in LiteSpeed Cache and others in Perfmatters if you wanted. For example, perhaps you want to use image optimization and WebP replacement in LiteSpeed. The important thing is simply not to enable the same feature in both plugins.