It doesn’t matter how fast your WordPress host is; you can never overcome network latency. A content delivery network (CDN) like Cloudflare fixes this by storing copies of your assets (images, CSS, and JS) on edge servers around the globe. When a visitor looks up your website, the content is delivered from the closest geographical server.
With Cloudflare Automatic Platform Optimization (APO), you can take this even further and serve the entire page (images, CSS, JS, and HTML) from the edge server. This means a request doesn’t even hit the origin server (your hosting provider). This results in insanely low time-to-first-byte (TTFB) and lightning-fast load times.
We’ll go tab by tab and share all the settings we use for Cloudflare on our WordPress sites (including perfmatters.io). The Perfmatters plugin fully supports Cloudflare, and we recommend it to all of our clients. If you don’t see a section mentioned, it means we most likely left that as the default on Cloudflare. This article explicitly focuses on performance; security settings might vary based on your needs.
It’s also important not to toggle on every setting just because it looks or sounds good. Many times security features have a performance cost associated with them.
Cloudflare setup on WordPress site
The first thing you’ll need to do (if you haven’t already) is create a free Cloudflare account and point your domain (DNS). Follow these steps.
Next, you’ll need to configure Cloudflare on your WordPress site. There are a couple of different ways to do this.
(Option 1) Free Cloudflare plugin
Your first option is to install the free WordPress Cloudflare plugin and connect your account with your API key. If your hosting provider already integrates with Cloudflare, you’ll probably want to skip to Option 2.
Note: Do not press the “Apply” button next to “Apply Recommended Cloudflare Settings for WordPress.” Instead, follow the recommendations in this doc.
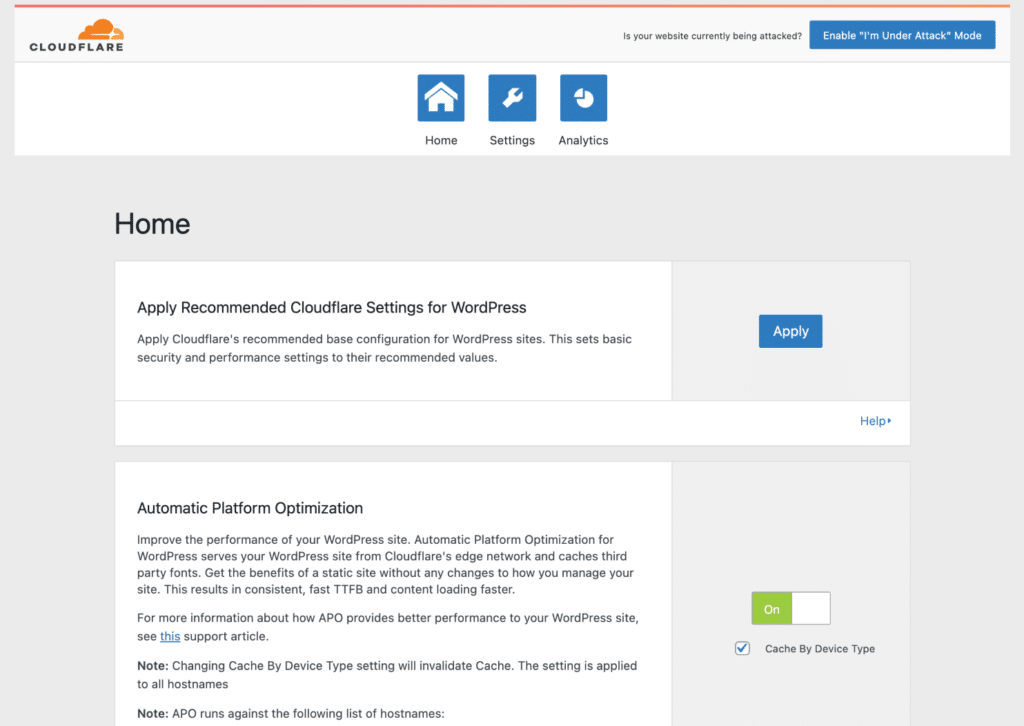
Many other WordPress optimization plugins also have integrations with Cloudflare.
(Option 2) Enable Cloudflare hosting integration
The second option is to enable the Cloudflare integration with your hosting provider. Kinsta is a great example of this as Cloudflare powers its CDN integration. With that being said, you might need to reach out to them to change one of the settings we’ll dive into below.
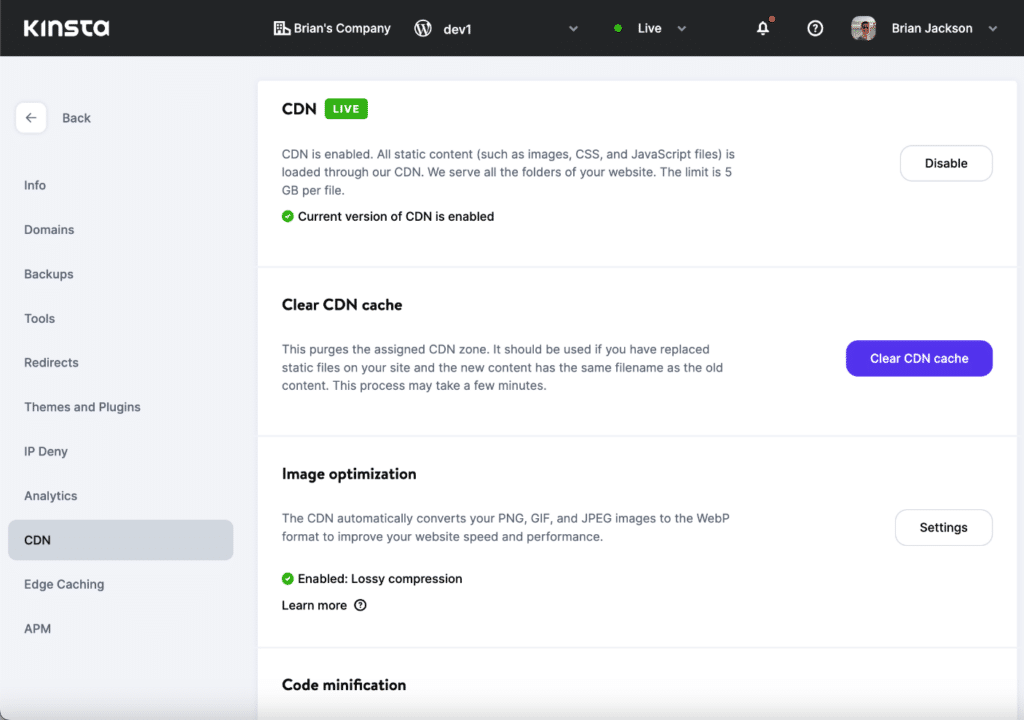
Cloudflare overview settings
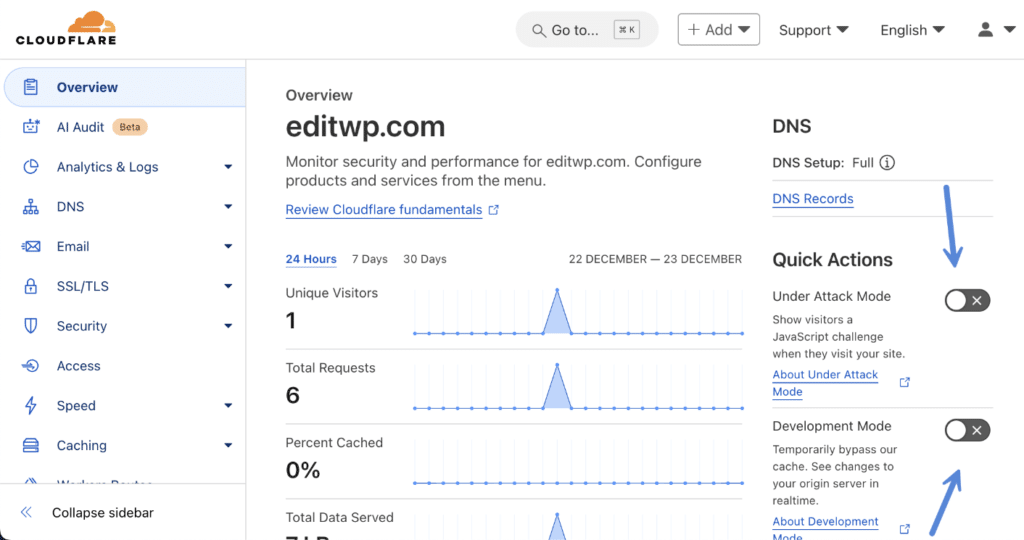
On the “Overview” tab, you’ll want to make sure you don’t have either of the following options enabled:
- Under Attack Mode
- Development Mode
Both of these will impact your site’s performance in a negative way. Development mode, for example, will bypass Cloudflare caching altogether. These should only be enabled when troubleshooting or if you think your site is undergoing a DDoS attack.
Cloudflare DNS settings
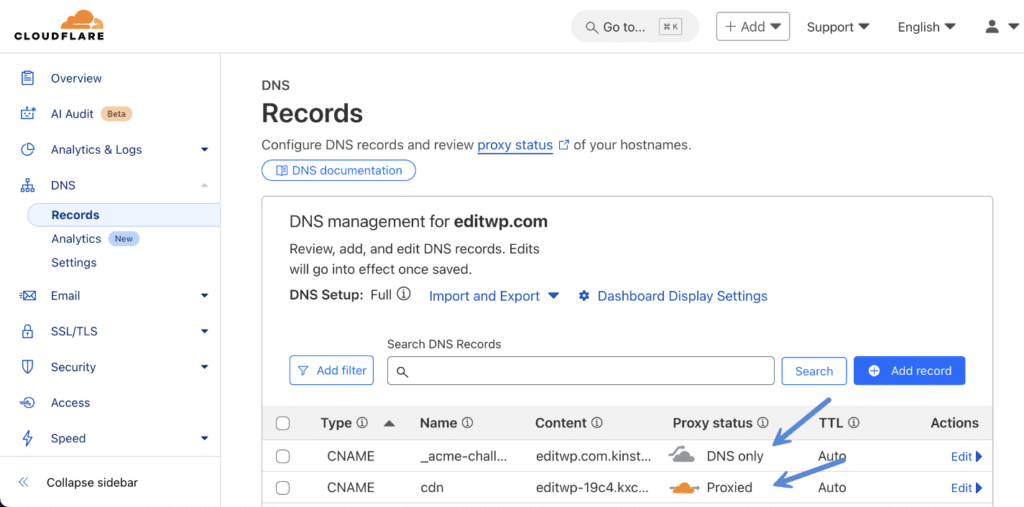
The most important thing regarding performance on the “DNS” screen is whether or not you have enabled a DNS record to use Cloudflare’s proxy.
When you have a grey cloud, this means you’re only using Cloudflare for DNS and routing. When you have an orange cloud, this means you’re using Cloudflare’s proxy, which enables all of their performance benefits, such as their caching, file optimization (minification), firewall, automatic platform optimization (APO), etc.
Note: Make sure to follow the documentation on how you initially set up Cloudflare. For example, if you’re using the free Cloudflare plugin, you’ll want to enable Cloudflare’s proxy (orange cloud). However, if you’re utilizing a hosting provider’s integration with Cloudflare, you might only need to enable the DNS functionality.
Cloudflare SSL/TLS settings
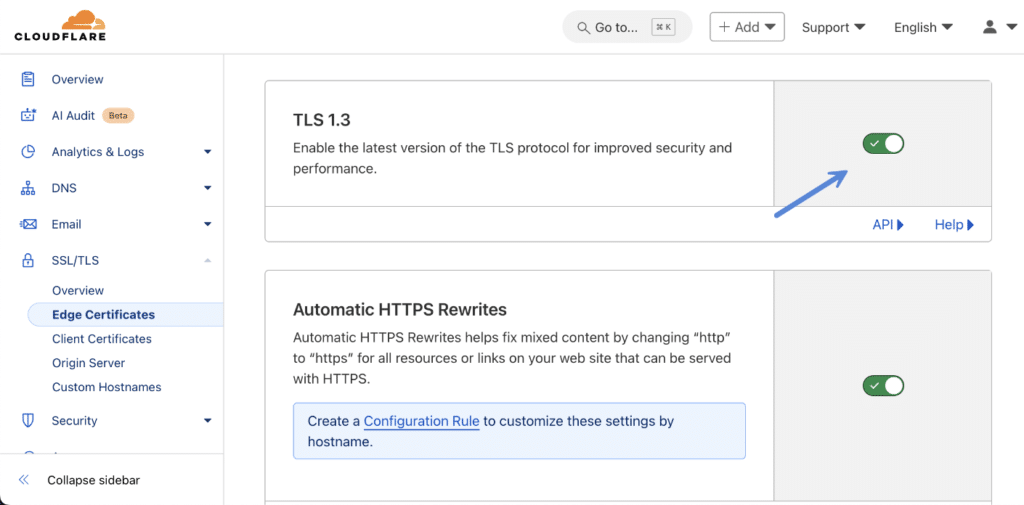
Under the “SSL/TLS” menu, click into the “Edge Certificates” screen. You should make sure TLS 1.3 support is toggled on. This helps both with performance and security.
Miscellaneous settings
- Opportunistic Encryption: Enabled
- Automatic HTTPS Rewrites: Enabled
Cloudflare security settings
Under the “Security” menu, click into the “Bots” screen. It’s recommended that you keep this off unless you’re dealing with a security issue. The reason is that it adds a JavaScript file (invisible.js). This will sometimes trigger the “Reduce JavaScript execution time” warning, as well as “Avoid long main-thread tasks.” We’ve seen this script add a 2,000+ ms CPU execution time and drop PageSpeed Insights scores by 20+ points. It has a huge impact on Total Blocking Time (TBT).

The feature also sometimes adds additional JavaScript files containing the following: /cdn-cgi/bm/cv/ and /cdn-cgi/challenge-platform/h/g/scripts/pica.js. See more about Cloudflare’s JavaScript detections. Bot Fight Mode might also block you from running tests in PageSpeed Insights. If this is happening, it will return an “Oops! Something went wrong” warning.
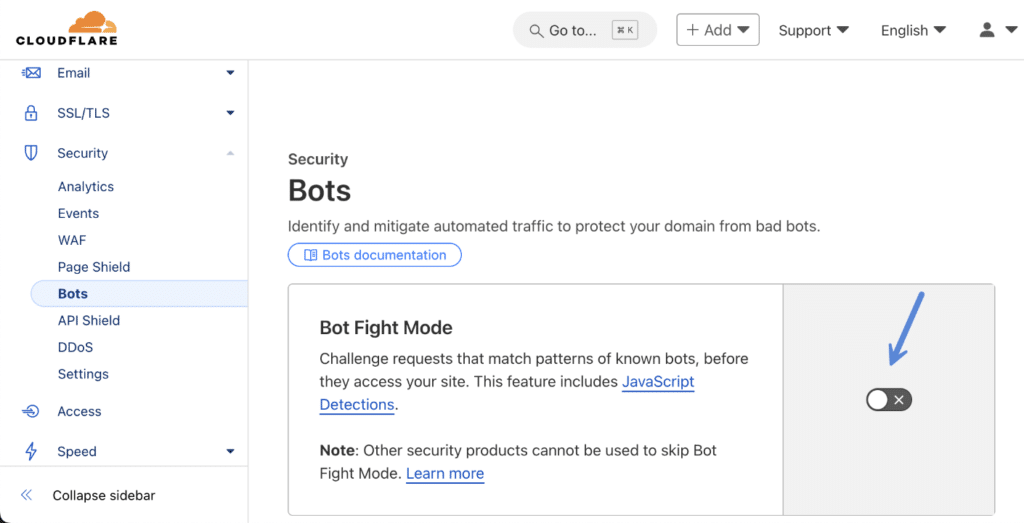
If you’re using a Cloudflare Pro plan or higher, this feature is called Super Bot Fight Mode. See their documentation on how to disable Super Bot Fight Mode.
There is also a feature to block AI bots, but this doesn’t directly impact your front-end performance, so that is more of a personal preference in terms of SEO and crawling bandwidth.
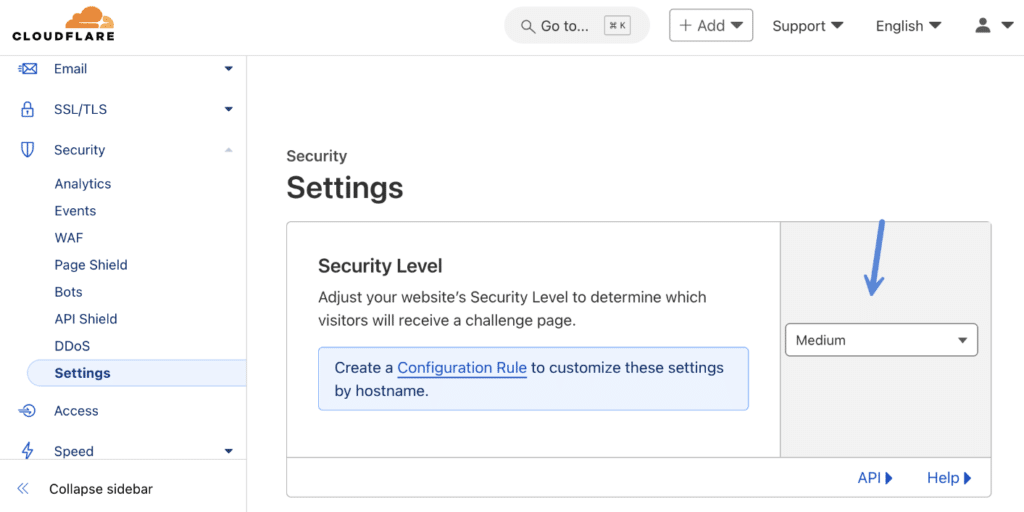
Then click into the “Settings” screen. We recommend setting your security level to one of the following:
- Essentially off
- Low
- Medium
Anything above that can start to impact your performance and overall user experience on your site.
Miscellaneous settings
- Browser Integrity Check: Enabled
- Replace insecure JavaScript libraries: Enabled
Cloudflare speed settings
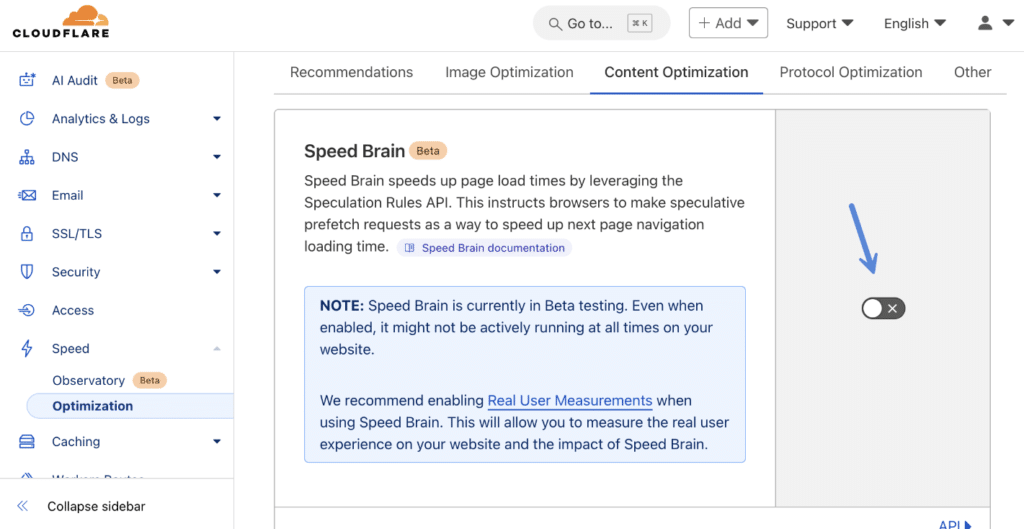
Under the “Speed” menu, click into the “Optimization” screen and then the “Content Optimization” submenu.
The first thing you should disable is Speed Brain (which is enabled by default). This feature enables Speculative Loading, which is great, but they default to prefetch, and it only works if the content is already cached by Cloudflare.
As of WordPress 6.8, Speculative Loading is now part of WordPress core and will automatically run on all requests. You can take this a step further by enabling the more powerful prerender mode using Perfmatters.
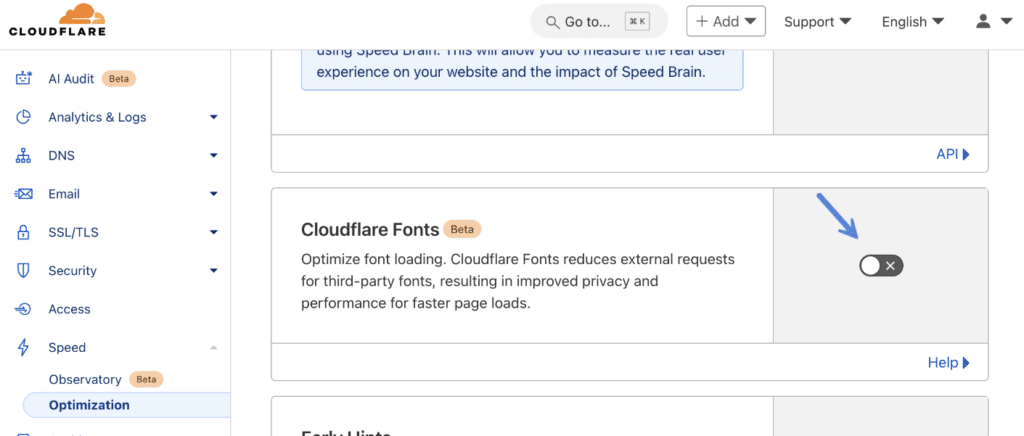
Cloudflare Fonts
If you’re using our Local Google Fonts feature in Perfmatters, we recommend keeping Cloudflare Fonts off. The reason is that we have more features to better optimize your fonts, such as adding display swap, limiting subsets, CSS load options, etc. They will still get cached and served from Cloudflare even with this feature off. We are also physically uploading the fonts to your site locally, whereas Cloudflare is simply pointing to them on the CDN.
Early Hints
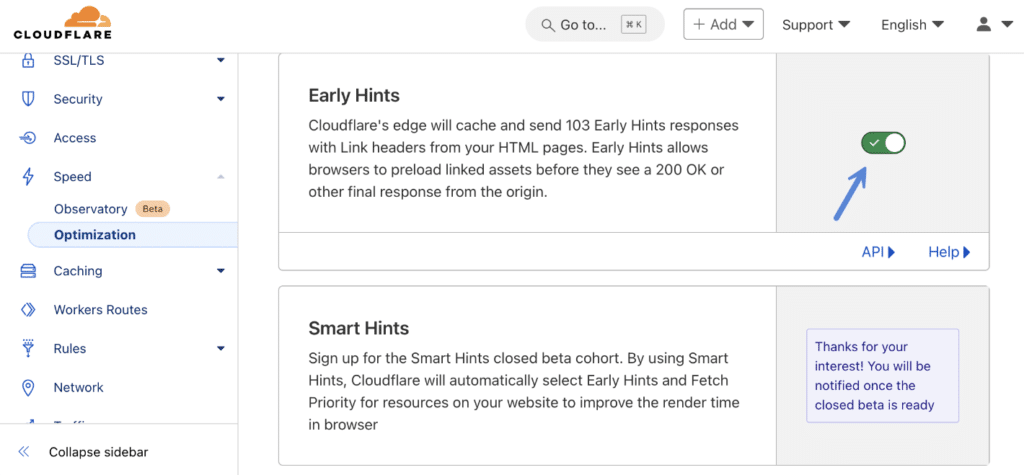
Early Hints grabs the preloads and preconnect link headers, caches them, and sends them as 103 Early Hints for subsequent requests so that future visitors gain an even greater performance benefit. In other words, it helps speed up preloads and preconnects. We recommend enabling this.
However, Early Hints doesn’t support <link> elements, only link headers. And this makes it hard to utilize the feature in WordPress. The good news is, Smart Hints is currently in closed beta. This will automatically select Early Hints and Fetch Priority for resources on your website to improve the render time in browser. So while many can’t utilize Early Hints yet, Smart Hints should enable this when it’s fully available.
Automatic Platform Optimization (APO)
Next is Automatic Platform Optimization. This is optional and costs $5/month per site (traffic volume doesn’t matter). The good news is you can sign up for it while still using the free Cloudflare plan. It’s important to point out that this is by far the most impactful feature out of everything Cloudflare offers. We use APO on all of our WordPress sites.
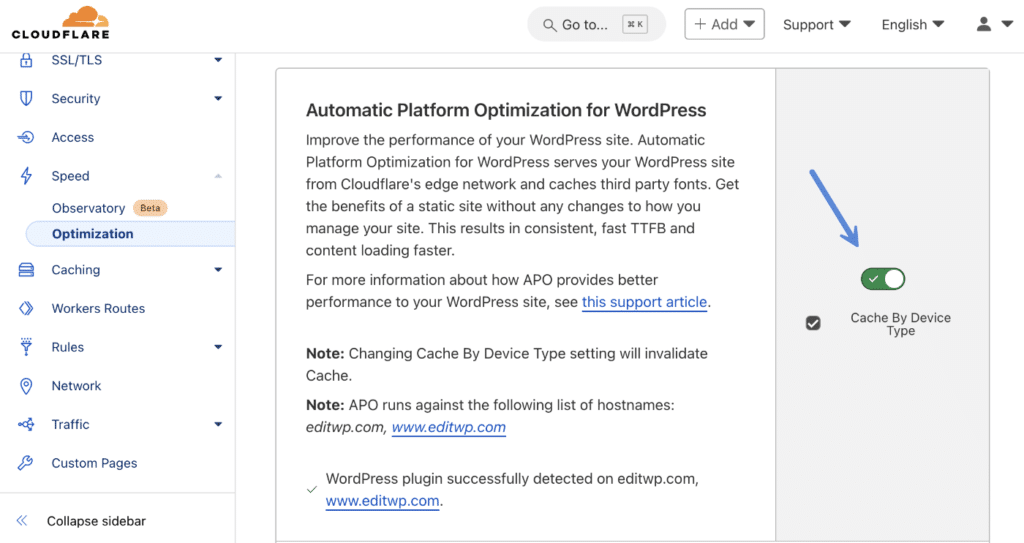
Why is APO such a big deal? Because it essentially caches your entire site, not just the assets but also HTML. In the past, a request would go to your hosting provider’s server to download the HTML and your CDN to download the assets (images, CSS, JS). With APO, all requests (until they expire) go directly to the Cloudflare edge server closest to the user (images, CSS, JS, and HTML).
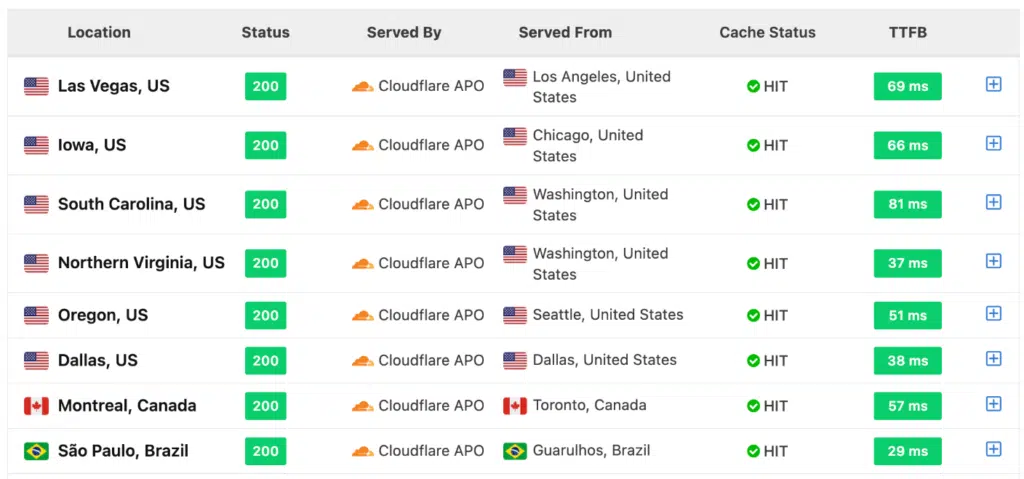
This eliminates the wait time (TTFB) issue and is insanely fast! You’ll never see the “Reduce initial server response time” warning in PageSpeed Insights again. In this screenshot, you can see our low and consistent TTFB.
It also doesn’t have to preload cache per edge server like a traditional CDN. APO uses its KV to store the cache, and on the first visit, it gets instantly distributed across all their edge servers. For most sites, you can think of it as automatically hosting a separate copy of your website around the globe. You also don’t have to mess with any confusing page rules.
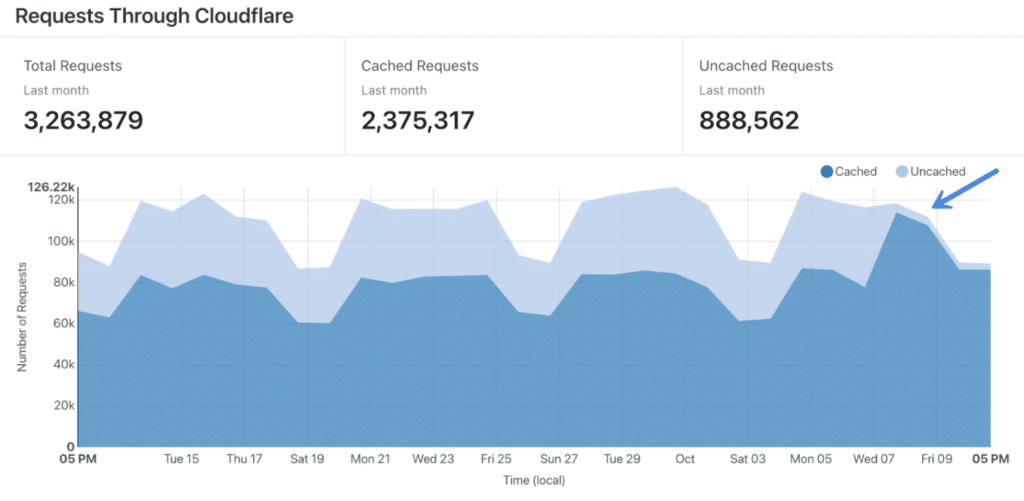
APO is also great for improving your HIT cache ratio. Check out what happened in the screenshot below when we enabled APO on our site. Our cached requests versus uncached requests increased dramatically! This is great for speed and perceived performance (how fast your site feels). More visitors hitting cache more often is always a good thing. APO also automatically caches query parameters for things like UTMs, FB, Google Ads, etc.
Hosting providers like Kinsta and Rocket.net have Cloudflare edge cache integrations, which they include for free for all their clients. You can enable it with a single click; no additional plugin or configuration is necessary.
If you don’t like the APO subscription, you can also use the free Super Page Cache plugin to enable full-page edge caching. They do it in a slightly different way, but it works great alongside Perfmatters.
Rocket Loader
We recommend keeping Rocket Loader turned off. This can vary per site, but many times we’ve seen it actually slow WordPress sites down. It also has a lot of compatibility issues with plugins and themes. We don’t use Rocket Loader on any of our sites.
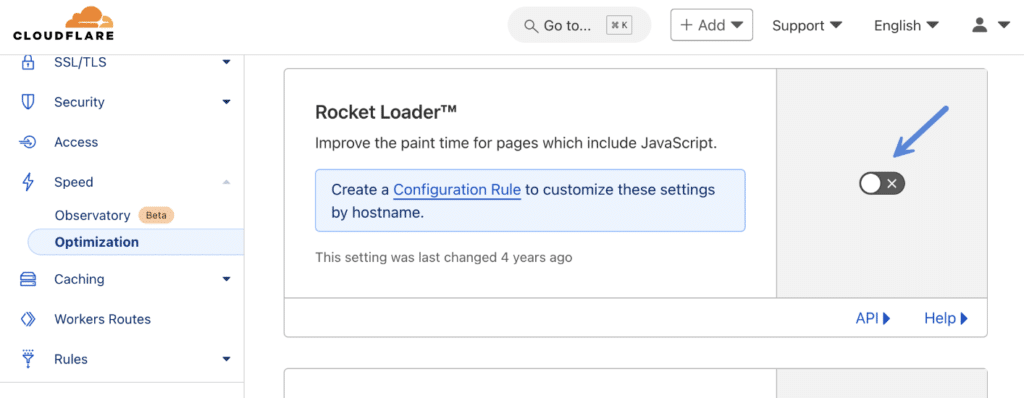
The main reason is that it adds a JavaScript file to your WordPress site (rocket-loader.min.js). We’ve seen this file included in the following PageSpeed Insights warnings:
- Reduce JavaScript execution time
- Does not use passive listeners to improve scrolling performance
- Avoid long main-thread tasks
- Serve static assets with an efficient cache policy

rocket-loader.min.js fileHTTP/3 (with QUIC) and HTTP/2 to Origin
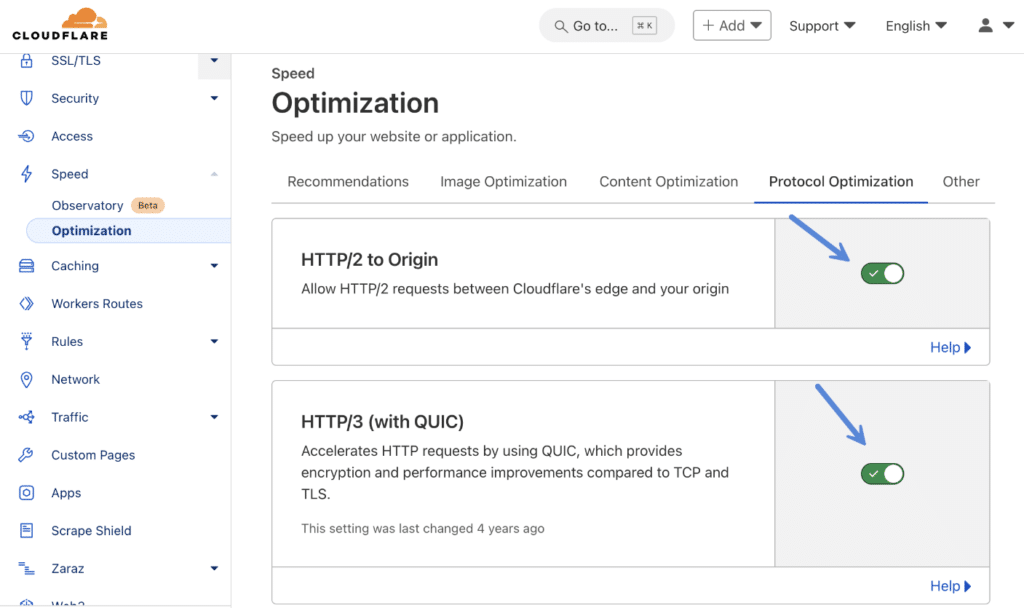
Under the “Protocol Optimization” submenu, we recommend enabling the following if they aren’t already.
- HTTP/2 to Origin
- HTTP/3 (with QUIC)
0-RTT Connection Resumption
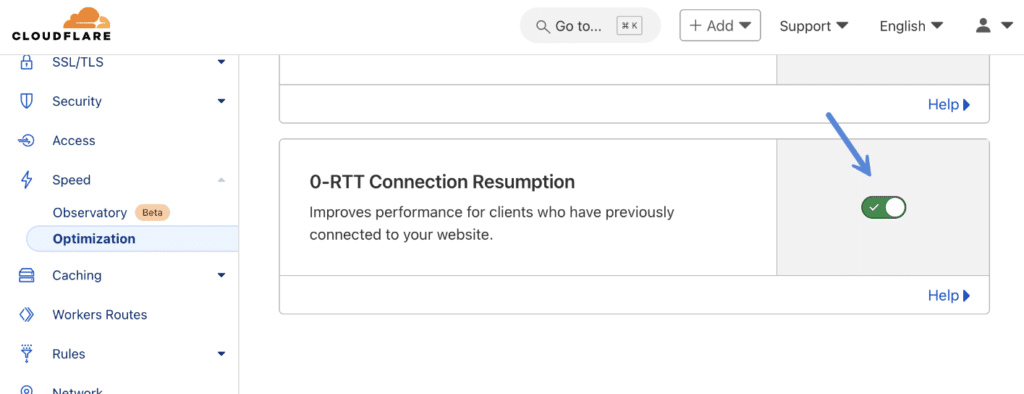
We also recommend enabling 0-RTT Connection Resumption. 0-RTT improves performance for those who have previously connected to your WordPress site.
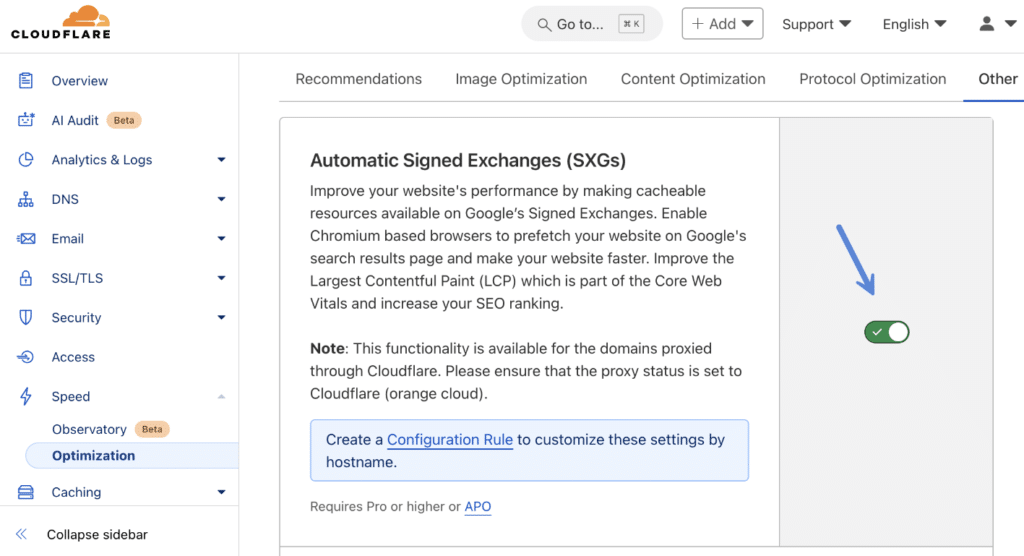
Automatic Signed Exchanges
Under the “Other” submenu, Automatic Signed Exchanges (SXGs) is a new feature that enables Chromium-based browsers to prefetch your website on Google’s search results pages. This can help improve Largest Contentful Paint (LCP). It requires Cloudflare Pro or higher, or APO.
We typically recommend enabling this. It used to cause an issue with Google’s Mobile-Friendly Test Tool, but since that is no more, we haven’t see any problems. We have this enabled on all of our sites.
Cloudflare caching settings
Under the “Caching” menu, click into the “Configuration” screen. We recommend setting your “Browser Cache TTL” to 1 month or higher. This will help resolve the warning to “Serve static assets with an efficient cache policy” warning from PageSpeed Insights. Google requires that your caching headers are at least 30 days or higher.
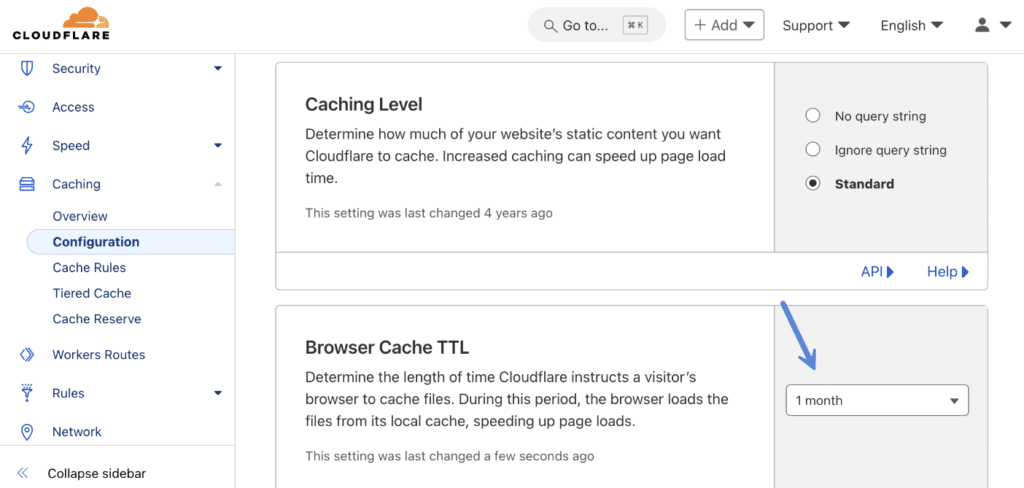
The longer your cache doesn’t expire, the better your HIT cache ratio is. This means more visitors are getting our website delivered using the lightning-fast cache from Cloudflare’s edge servers.
If you’re using a feature like Cloudflare APO, increasing the cache TTL can help improve your site’s time-to-first-byte (TTFB).
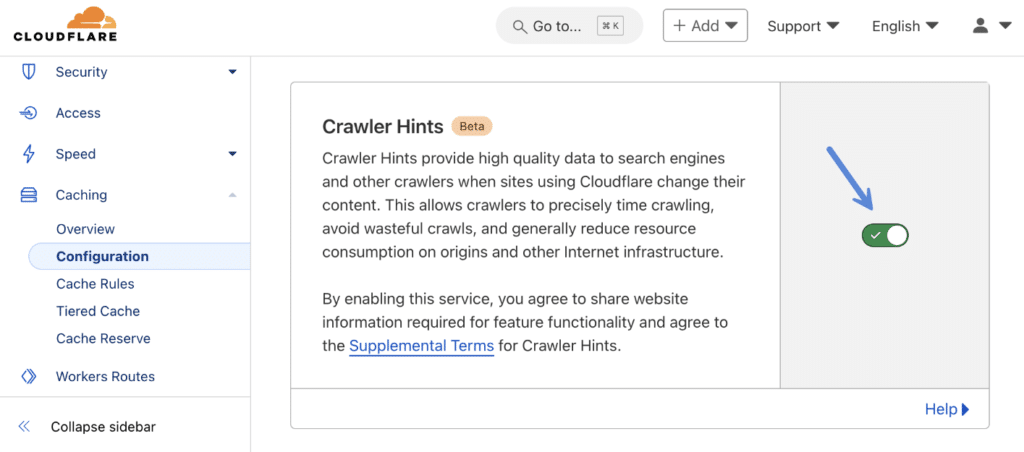
Crawler Hints
Search engines like Bing, Yandex, and DuckDuckGo utilize the IndexNow protocol to notify them of content changes. Cloudflare Hints helps improve the efficiency of crawlers and also limits them if the content hasn’t changed. We recommend enabling this feature to reduce the load on your origin server.
Always Online
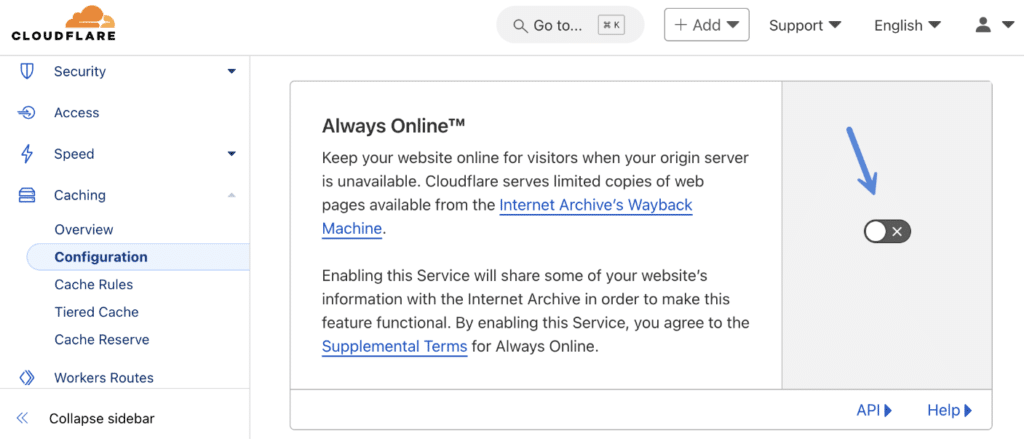
Cloudflare’s Always Online service crawls your site periodically and adds it to the Internet Archive’s Wayback Machine. While this is kind of cool, it’s not very helpful for e-commerce sites. They won’t function properly anyways and therefore we prefer to keep crawlers to a minimum wherever possible. The fewer things hitting/crawling your site the better. Therefore, we don’t recommend enabling Always Online.
Miscellaneous settings
- Caching Level: Standard
Smart Tiered Cache Topology
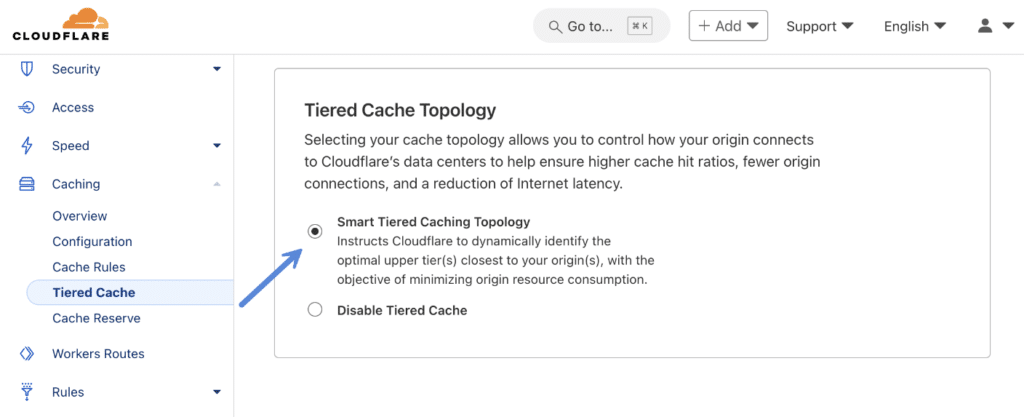
Under the “Tiered Cache” menu, enable “Smart Tiered Caching Topology.” Tiered caching improves bandwidth efficiency, reduces origin load, and makes websites more cost-effective to operate by limiting the number of data centers that can request content from the origin.
Cache Reserve (optional)
Cache reserve is actually pretty awesome! It enables a way to extend the cache length on assets that might not change very often. This reduces the requests back to your origin server and will increase your cache HIT ratio.
However, it’s not free. Although it’s very cheap, even with a lot of data. See the pricing. The biggest downfall right now though is that it only supports assets that have a Content-Length response header (see asset eligibility). This is basically just images. HTML, CSS, and JS won’t be eligible for this, at least not right now. But if you have a high-traffic site with a lot of media, it could very well be a great way to boost your cache performance a bit.

Cloudflare traffic settings (optional)
This step is entirely optional. Under the “Traffic” menu, click into the “Argo” screen. You can enable Argo, which helps reduce network latency. In other words, it helps speed up the connection to your origin server. Argo starts at a minimum of $5/month, and after the first gigabyte, you will be billed at $0.10 per gigabyte. For example, if you average 100 GB of data transfer, it will cost $15.00/month.
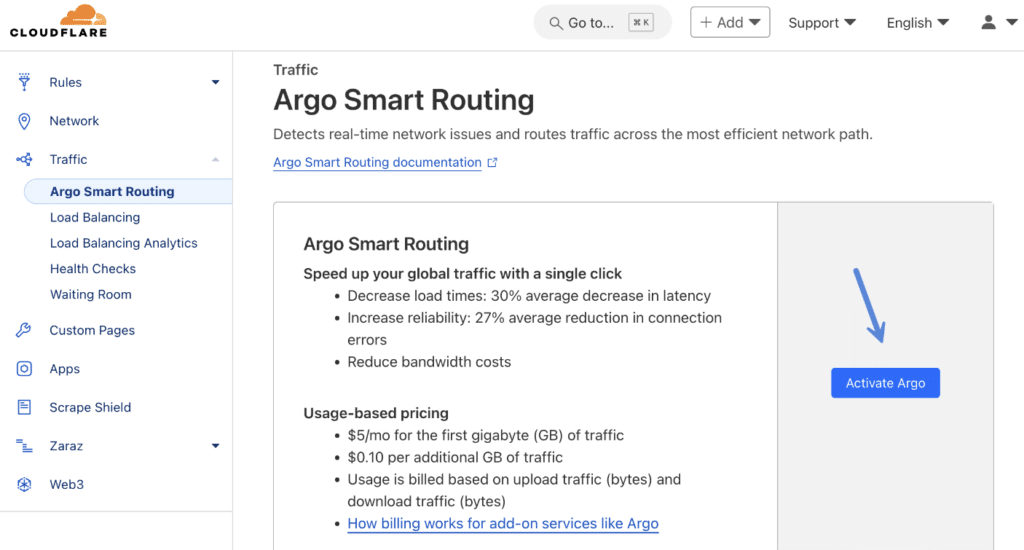
We don’t use Argo on our sites. However, if you have a high-traffic site and don’t mind the additional charges, we do recommend enabling Argo. It’s important to note, though, if you’re trying to choose, APO produces much more noticeable results than Argo. You can, however, use both at the same time for even better performance.
Cloudflare Scrape Shield settings
Under the “Scrape” menu, we recommend turning off “Email Address Obfuscation.” This supposedly helps by obfuscating email addresses on your website. However, we don’t recommend putting your email address on your public site. There are many ways for spammers to still take advantage of it.
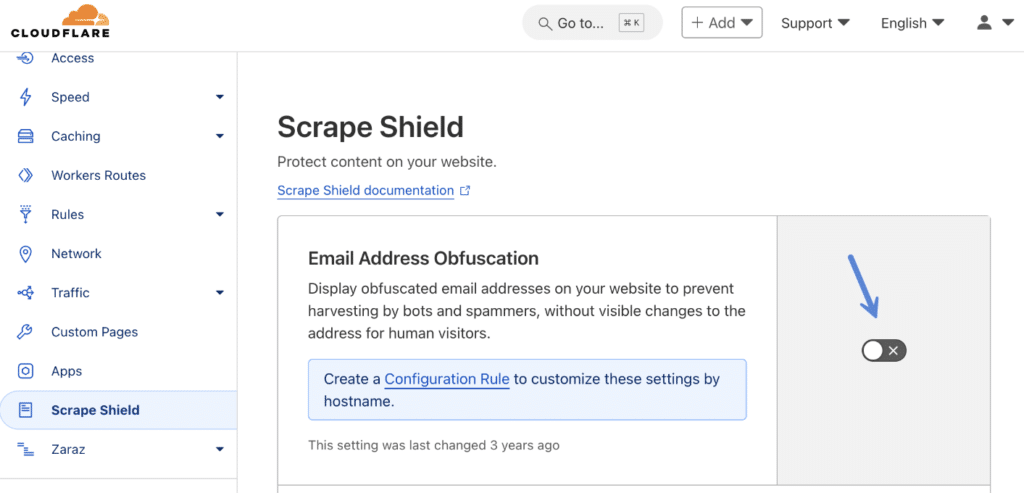
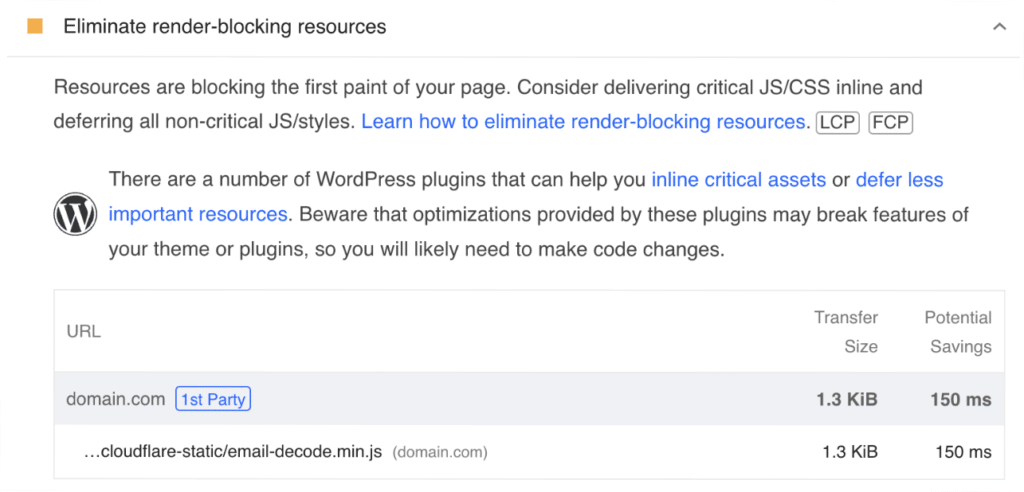
The main reason you don’t want this enabled is that it adds a JavaScript file to your WordPress site (email-decode.min.js). We’ve seen this file included in the following PageSpeed Insights warnings:
- Eliminate render-blocking resources (this impact LCP)
- Avoid long main-thread tasks (TBT)
- JavaScript execution time (TBT)
- Avoid chaining critical requests (this impacts LCP)
- Serve static assets with an efficient cache policy
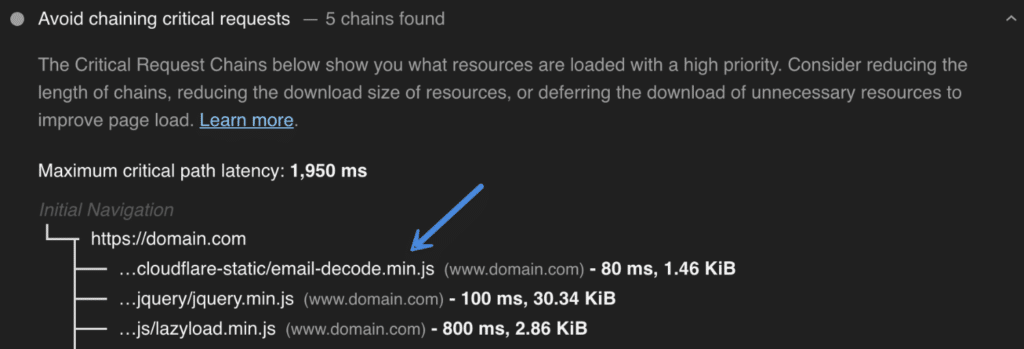
email-decode.min.js fileWeb Analytics
Cloudflare Web Analytics provides free, privacy-first analytics for your website. The problem is that many users who have this enabled are also already using Google Analytics or another privacy-focused analytics solution such as Fathom (which we highly recommend).
You should never have multiple analytics scripts running. Cloudflare Web Analytics requires that you add a JavaScript file to your WordPress site (https://static.cloudflareinsights.com/beacon.min.js). This will show up in PageSpeed Insights and contribute to your site’s performance.
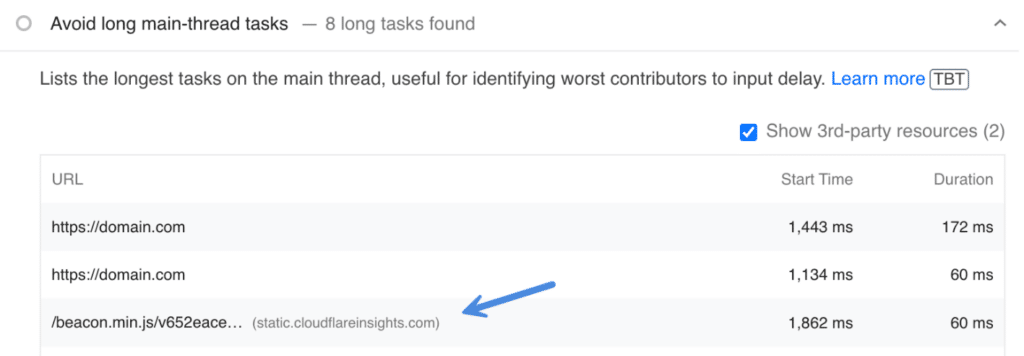
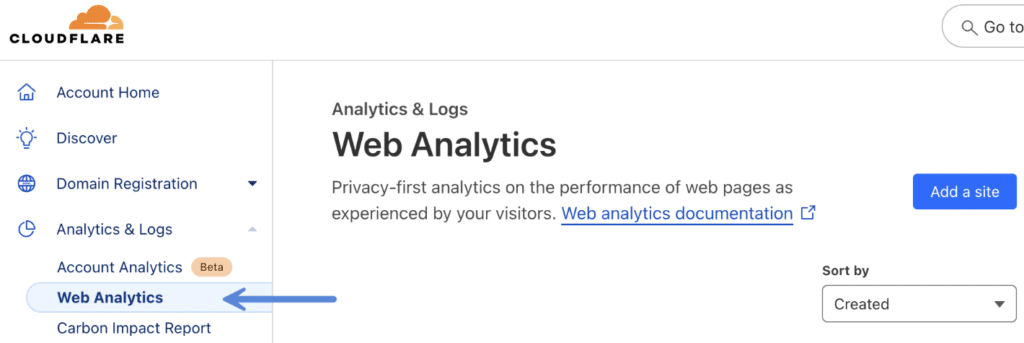
beacon.min.js long main-thread taskTherefore, if you already have another analytics solution, we recommend removing Cloudflare Web Analytics. This shouldn’t be on by default, but you can confirm by going to “Analytics & Logs → Web Analytics” and ensuring it is toggled off for your domain. If you’ve added their JS manually, you will need to remove the script from your WordPress site.
Is the Cloudflare Pro plan worth it?
Everything above is using the free Cloudflare plan, which is what we use on all of our sites. We do recommend using Cloudflare APO ($5/month) if you can. However, we don’t personally think the Cloudflare Pro plan is worth it (for performance) unless you need a lot more rules and configurations. Typically Cloudflare Pro is only needed for very large sites.
However, the image optimization in Cloudflare Pro (Polish) can come in handy if you don’t already have an image optimization solution in place.
Remember to also check with your hosting provider, many WordPress hosts have a Cloudflare integration already (Kinsta, Rocket.net, etc.) provided or offered as an add-on. And many times they offer Cloudflare Enterprise, which is even better than Cloudflare Pro. They are able to do this due to the fact that they get bulk discounts with volume, and then bundle that into their service.