Sometimes the smallest of changes can make a huge impact when it comes to performance as well as security. By default, WordPress uses yourdomain.com/wp-admin/ and yourdomain.com/wp-login.php for your login URLs. The problem with this is that bots, hackers, etc., all scan for these when looking for vulnerabilities and entry points into your site. We’ve worked with many sites that see 10,000+ failed attempts per day trying to gain access.
By simply changing the login to something more obscure, you can combat this. It’s also great for performance as it decreases bots scraping common areas of your site.
- Change WordPress login URL
- Disabled behavior
- Custom login URL message
- Troubleshooting login URL problems
Change WordPress login URL
Follow the steps below to change your WordPress login URL.
Important: If you have another plugin already changing your WordPress login URL, make sure to disable it first before changing it in the Perfmatters plugin.
Step 1
Click into the Perfmatters plugin settings.
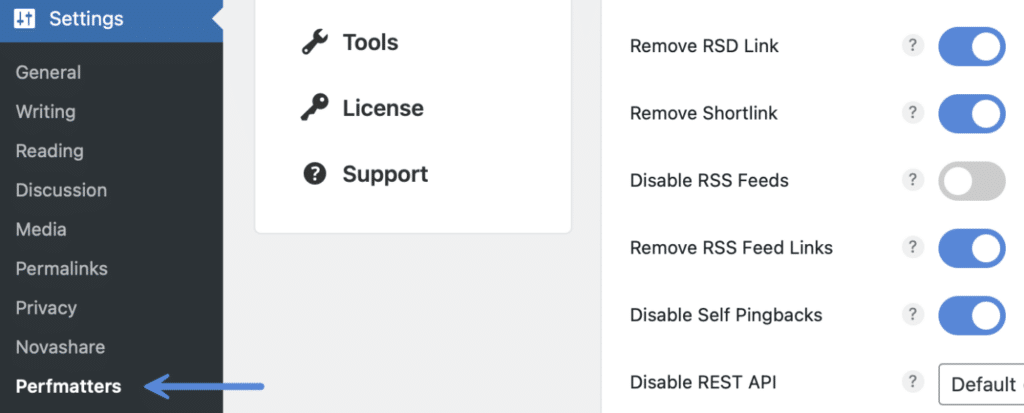
Step 2
Make sure you’re on the “General” submenu.
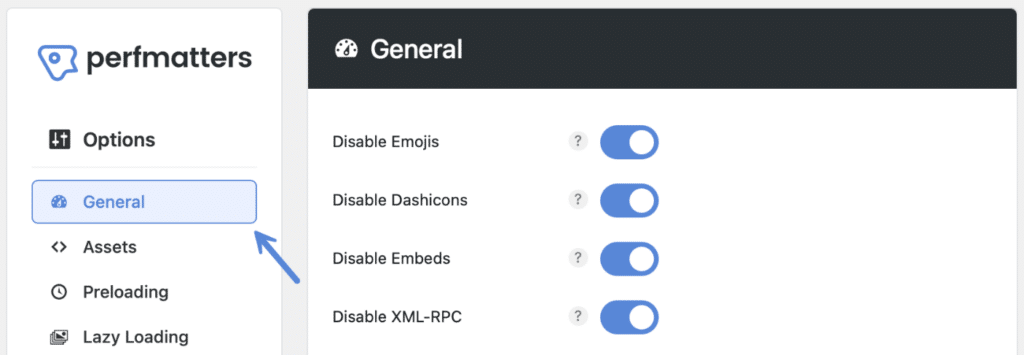
Step 3
Under the “Login URL” section, input a new login URL under “Change Login URL.” You can change this to whatever you want. We recommend getting creative!
Important: Only add characters, no forward slashes.

Step 4
Scroll down and click “Save Changes.”
When set, this will change your WordPress login URL to the provided string (https://yourdomain.com/yourstring) and will block wp-admin and wp-login endpoints from being directly accessed.
Remember to bookmark your new login URL. After you change your WordPress login URL, the old default login URLs (/wp-admin and /wp-login.php) will no longer be accessible and will result in a “This has been disabled.”

Disabled behavior
You can change what happens when the original login endpoint is visited (/wp-admin and /wp-login.php). There are four options to choose from:
- Message (default): Display a message to the user. You can customize the message.
- 404 template: User is sent to a 404 page.
- Home URL: User is redirected back to the homepage.
- Local Redirect: User is redirected to slug. You can customize the slug.

Message
The default behavior for disabling the original login endpoint is to display the “This has been disabled” message. But you can write any message that you want.

In terms of the browser request (not the user), a 403 HTTP status code is sent when someone hits the old default login URL. This means the requested resource is forbidden.
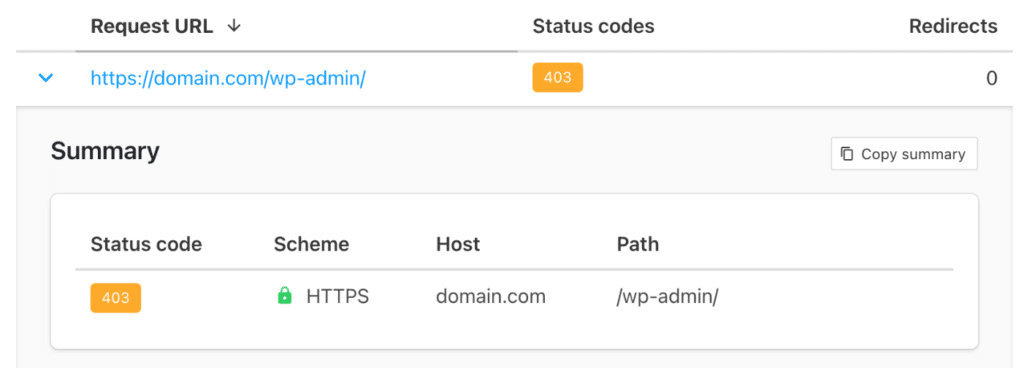
404 Template
If you select “404 Template” for the disabled behavior, the user will be sent to your site’s 404 page if they enter the old default login URLs (/wp-admin and /wp-login.php). See the example below.

Home URL
If you select “Home URL” for the disabled behavior, the user will be redirected to your homepage if they enter the old default login URLs (/wp-admin and /wp-login.php).
Local Redirect
When using the Local Redirect option, you can choose which slug to redirect the user to. For example, 404.

Troubleshooting login URL problems
If you are experiencing problems with your login URL, here are a few common things to try.
Exclude login URL from caching
We highly recommend that you exclude your custom login URL from caching, as this can sometimes cause conflicts with other plugins. If you’re running on a WordPress host such as Kinsta, simply reach out to their support team and ask them to exclude your new login URL from caching.
If you don’t exclude your custom login URL, you might encounter one of the following errors.
Error 1: Cookies are blocked or not supported by your browser. You must enable cookies to use WordPress.
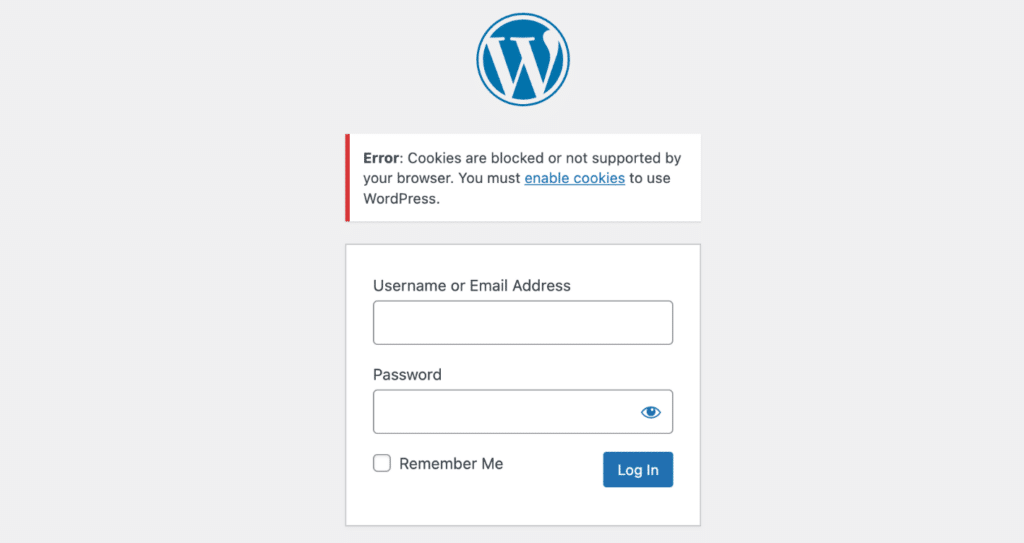
Error 2: Your password reset link appears to be invalid. Please request a new link below.
WP Rocket
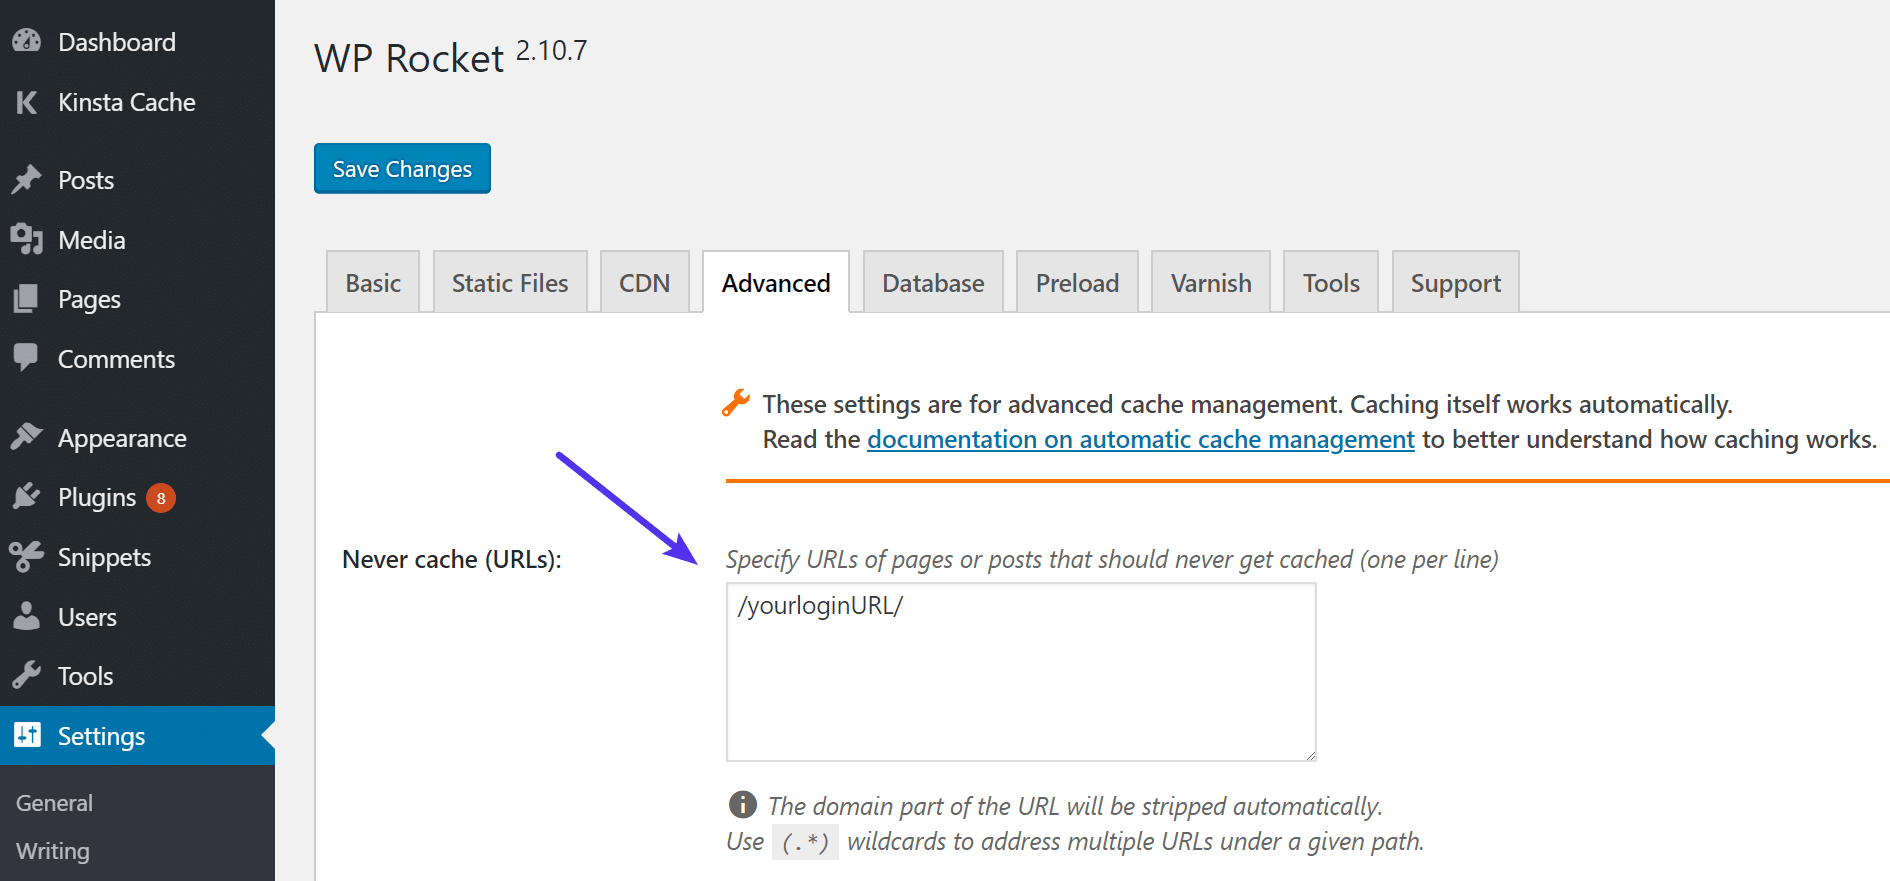
If you’re utilizing a caching plugin like WP Rocket, simply add your custom URL under “Advanced → Never cache (URLs):”
Breeze
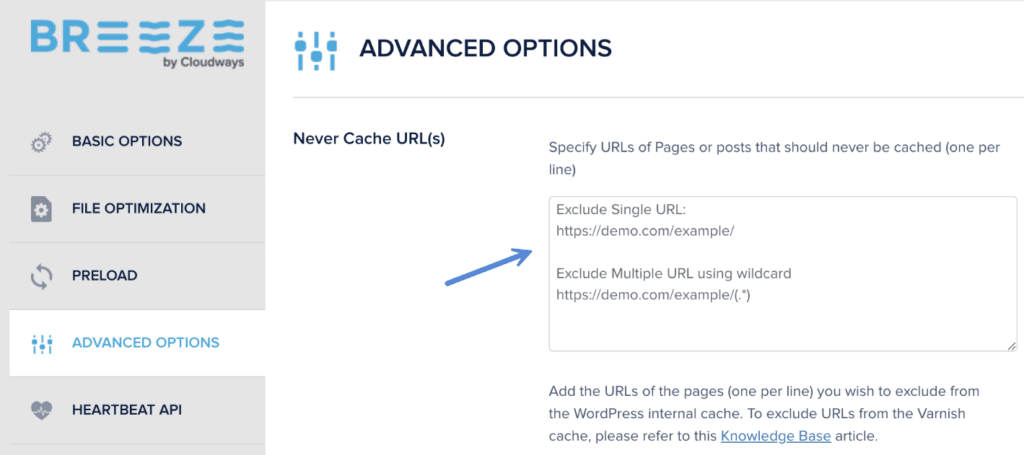
If you’re utilizing a caching plugin like Breeze, simply add your custom URL under “Advanced Options → Never cache (URLs).” If you are hosting with Cloudways, make sure also to exclude the URL from Varnish caching.
Cloudflare
If you’re using a full proxy or CDN like Cloudflare, you might also need to add a rule to bypass cache on your custom login URL. You can do this on the free and paid Cloudflare plans. Simply add a rule with the cache level set to bypass and your URL pattern:
*domain.com/yourloginURL/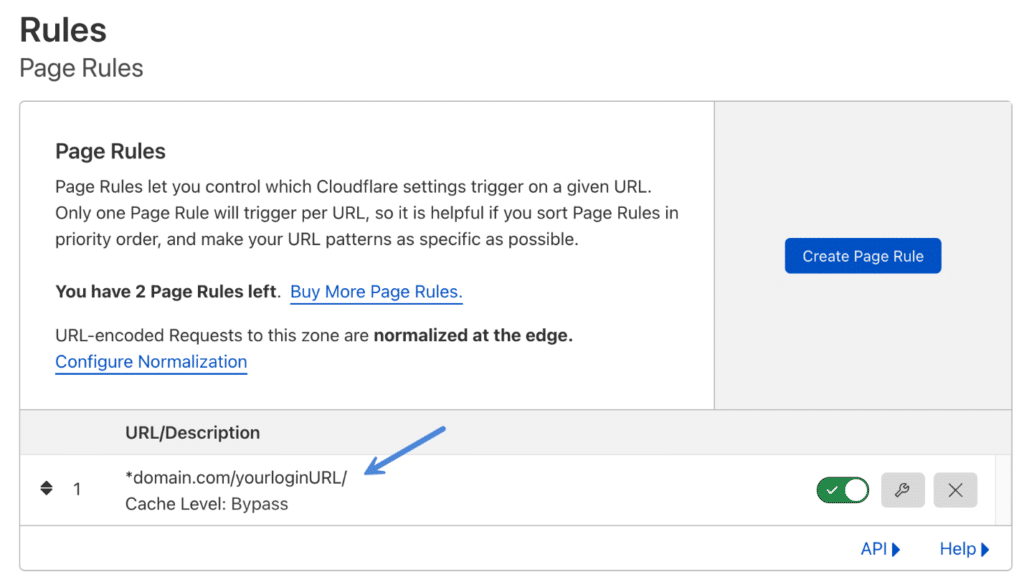
Forgot login URL
Forget your WordPress login URL? Follow these steps.
Re-save permalinks
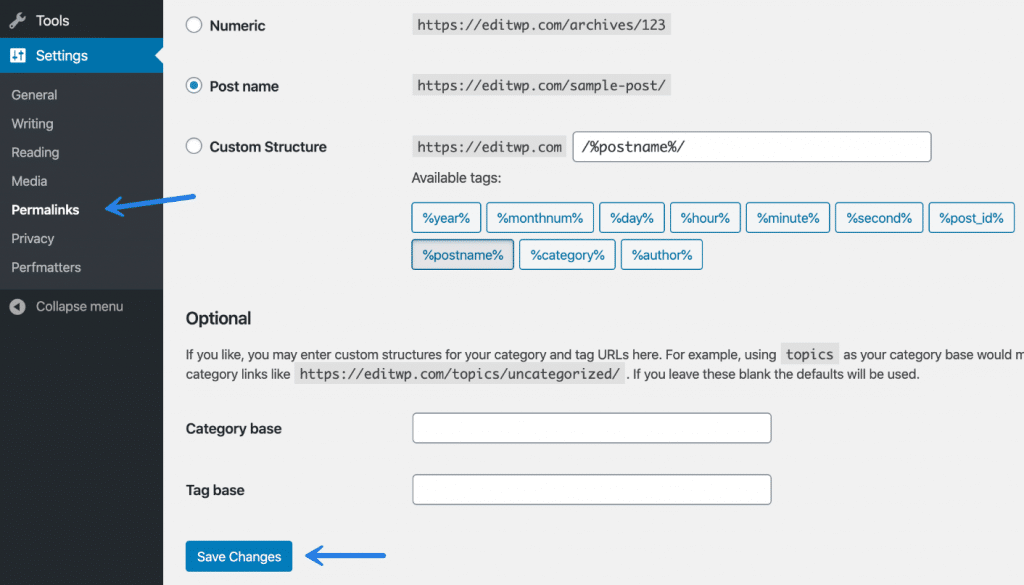
If you are experiencing problems logging in and still have access to your WordPress admin dashboard, you can try to re-save your permalinks. Click into “Permalinks” and click on “Save Changes.” This will flush out any permalink cache.
Two-factor authentication
If you are using a custom login URL, any two-factor plugin that does the authentication on your own site should work fine. Here are just a couple we’ve personally tested:
Perfmatters doesn’t support Jetpack’s two-factor authentication feature at this time. This is due to how they authenticate externally with WordPress.com.