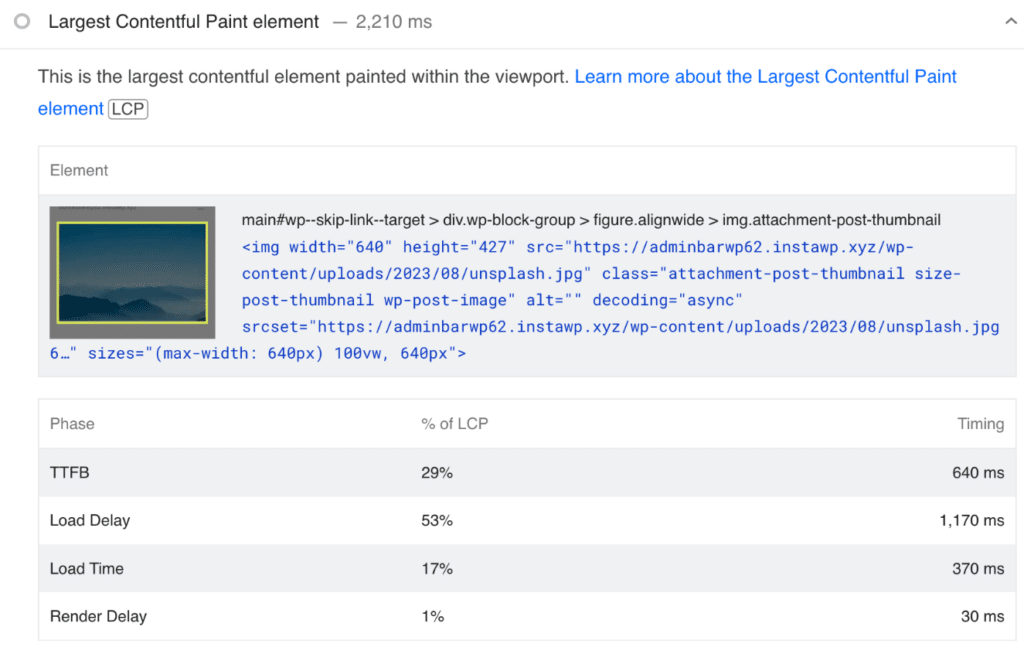
If you’ve ever run a PageSpeed Insights test, you’ve probably seen the diagnostic message referencing the Largest Contentful Paint (LCP) element. LCP marks the point in the page load when the main content has likely loaded. Typically this is an image, although it can be other things, such as text. In this article, we’ll dive into how to use fetch priority on your WordPress site to help improve LCP and optimize Core Web Vitals.

What is fetch priority?
Fetch priority is an HTML attribute from Google that enables you to hint at the priority of a resource, such as high or low. It’s similar to preload and many times has the same result, but not as aggressive. It allows the browser to still prioritize other resources as it sees fit, whereas preload moves the resource first in the load order.
Let’s use featured images on a blog post as an example. These are commonly flagged as the LCP element. Ideally, you want that image to load within the first few requests. However, many times that simply isn’t the case due to how themes and page builders are structured. We’ve seen sites where the LCP image might be 20 requests down. You want to paint the page (or load) from top to bottom. When things are out of order, this can cause higher LCP.
That’s where fetch priority comes into play. You can add the fetchpriority="high" attribute to the featured image or any resource to prioritize it (see browser support). Resources with the same priority are generally loaded in the order they are discovered.
Here is an example:
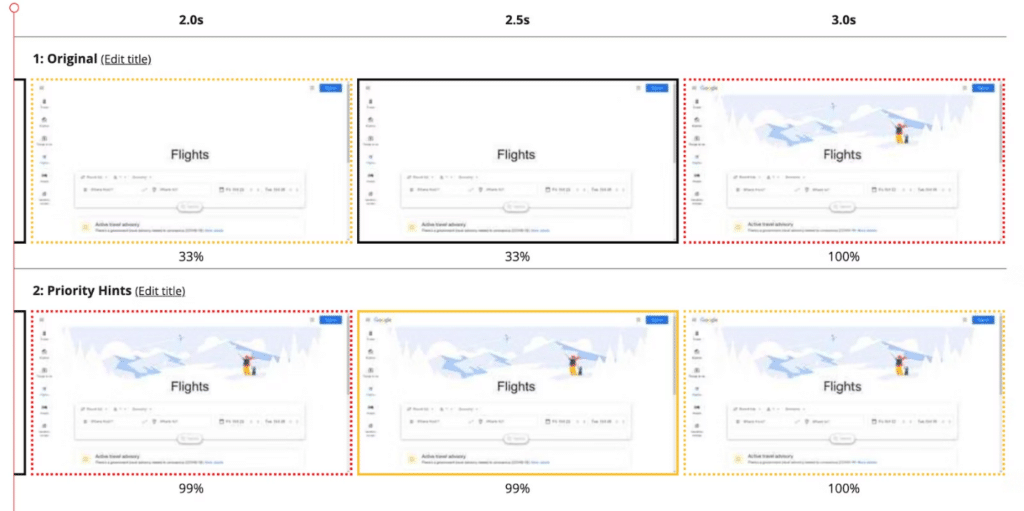
<img src="lcp-blog-post-image.png" fetchpriority="high">In Google’s own tests, they were able to improve LCP from 2.6 seconds to 1.9 seconds simply by adding fetchpriority="high" on the LCP element.

You can still use manual preloads and features like preload critical images, but there will be many instances where you might want to use fetch priority now instead. See more on fetch priority versus preloads.
How to add fetch priority
As of version 6.3, WordPress now attempts to add fetchpriority="high" on what it thinks is the LCP image (more info). It’s added to the first image that satisfies all of the following conditions:
- The image is not lazy-loaded.
- The image does not already have a
fetchpriorityattribute. - The size of the image has dimensions greater than 50,000 square pixels.
While this is incredibly helpful, it won’t always work, and it very much depends on the theme, page builder, and a variety of other factors. That’s why we’ve also added a fetch priority feature, allowing you to target any resource on your site. This enables you to take it a step further and really fine-tune things to improve LCP across the board.
If you’re using lazy loading in Perfmatters, we automatically exclude images with the fetchpriority attribute added by WordPress core from lazy loading. This helps to automate lazy load exclusions for LCP images above the fold.
To add fetch priority on a resource, follow the steps below.
Step 1
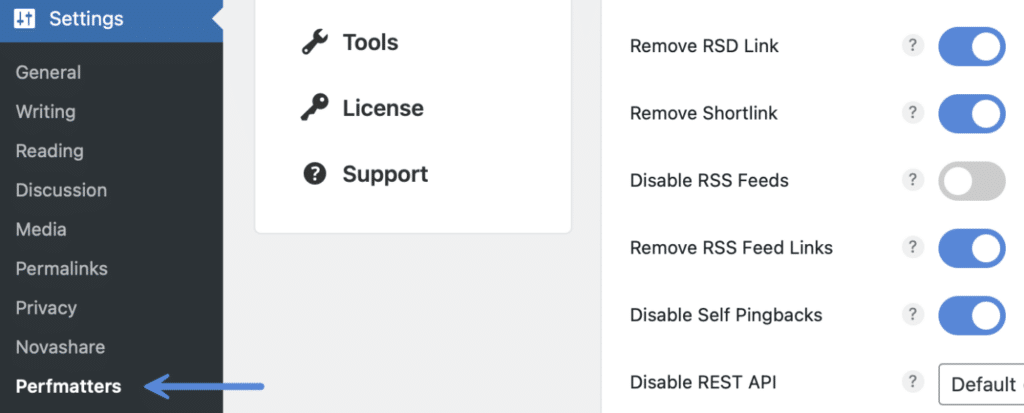
Click into the Perfmatters plugin settings.

Step 2
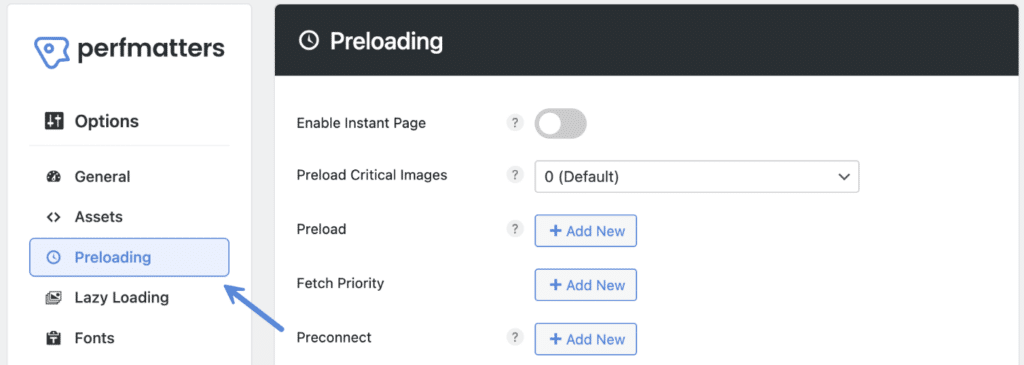
Click on the “Preloading” submenu.

Step 3
Under the “Fetch Priority” section, click on “Add New.”

Step 4
Enter a class name, ID, or filename for the resource you want to add the fetchpriority attribute on. It’s supported on <img>, <link>, and <script> tags.
Then select either “High” or “Low” for the priority. In many cases, you’ll want to use “High.”

If you want to target a parent container (<div>, <figure>, <section>, etc.), you can enable the “Search by Parent Selector” option. This can be incredibly powerful due to the fact that many images don’t have unique classes on them. However, their parent containers almost always do. This allows you to now dynamically target things across your whole site.

Fetch priority by device
By default, the fetchpriority attribute will be added to resources on all devices. Typically this is fine, as it will utilize responsive images on your site, including srcset and sizes.
However, you can choose desktop or mobile if needed. To use fetch priority only on mobile, you’ll need to ensure you have separate mobile caching enabled:
- Most hosting providers with server-level cache already have separate caching buckets for devices in place, which means you don’t need to do anything.
- If you’re using Cloudflare APO, you can enable cache by device type.
- If you’re using edge cache from a hosting provider, they will sometimes have a separate mobile cache option. For example, Kinsta edge cache has this.
- If you’re using a caching plugin like WP Rocket or Cache Enabler, many have a separate mobile cache option.
Fetch priority location
You can also set a location. Perhaps you need to add fetch priority on an image just on your homepage, but nowhere else. Use blog if your homepage is a blog feed. Otherwise, add the post ID. You can add multiple locations, comma-separated.
Note: If you have two different physical pages in WordPress that switch based on desktop or mobile, you’ll most likely need to use the post ID of your desktop homepage but then select “mobile” for the device.
Step 5
Scroll down and click “Save Changes.”
Fetch priority versus preloads
We recommend using fetch priority in cases where you want to dynamically move things higher. Featured images, gallery images, and resources above the fold. This can give you easy performance gains and lower LCP across your entire site.
Preloads should be used for resources like CSS background images above the fold and fonts. Google doesn’t support adding the fetchpriority attribute on CSS background images.
FAQs
Google recommends using both but for different use cases (as mentioned above).
You wouldn’t need to add the fetchpriority attribute to a resource that is already preloaded. However, both manual preloads and the preload critical images feature will take precedence over fetch priority as it’s more aggressive.
Since preload are more aggressive, there might be times when they still result in better performance as opposed to fetch priority. However, as with everything performance, we recommend testing which one works better for your site.
Disable core fetch
We’ve noticed that many times WordPress core adds the fetchpriority attribute on the wrong LCP element, such as an image below the fold. The three conditions they use aren’t always perfect. This is usually due to how the theme or page builder is coded.
The problem that creates is that the image will load sooner than it should be, and we’ll automatically exclude it from lazy loading. That could actually hurt the performance of your site. In this case, you can disable the fetch priority feature in WordPress core and add it with our fetch priority feature instead.
Follow the steps below to disable the fetch priority attribute added by WordPress core.
Step 1
Toggle on “Show Advanced Options” in Perfmatters.
Step 2
In the Preloading section of Perfmatters, scroll down and toggle on “Disable Core Fetch.”

Step 3
Scroll down and click “Save Changes.”
Disable fetch in Elementor
If you’ve disabled fetch in WordPress core and are still seeing fetch applied on a wrong image, it could be coming from your page builder. For example, we’ve seen Elementor improperly add fetch on images below the fold. You can disable fetch in Elementor by turning off “Optimize Image Loading” under “Settings → Features.”