While front-end performance is very important for factors like SEO, customer experience, bounce rate, Core Web Vitals, etc., back-end performance also plays a part. Especially in terms of maintenance and publishing content, there is nothing more frustrating than working on a site with a slow back-end. Below, we’ll dive into a few tips on how you can speed up your WordPress admin dashboard.
These optimizations can also be helpful on larger ecommerce sites where perhaps certain areas, such as the checkout page, aren’t cached or optimized by a plugin.
Important: Many of these tips include changes to your database or files. It’s recommended to back up your WordPress site before proceeding.
1. Powerful hosting
Your hosting provider and the physical location of your server to where you’re located play the most important role in terms of back-end speed. I can’t emphasize this enough. You always get what you pay for. We recommend investing in a managed hosting provider.
When you are in your WordPress admin dashboard, these are typically all uncached requests. This means it hits your server every time you load an admin page or edit a post, as opposed to the front-end where things might serve entirely from cache or edge cache. Back-end speed is based on your server’s resources, CPU (PHP workers), memory, etc. The more powerful the server, the faster the back-end.
The physical location also matters a lot. Since the back-end isn’t serving from cache, the farther away you are from your server, the slower it will be (due to network latency). This also results in higher time-to-first-byte (TTFB). You should choose a central location for your server first based on where most of your visitors are. But it’s also good to keep your location in mind as well. Ideally, you want it to be close to everyone, if possible.
The location will also impact other things, such as the speed of SFTP. If you’re regularly moving files or developing on your site, this could be an important factor for you.
Note: If your hosting provider has an object cache feature (Redis, Memcached, LSCWP, etc.) this can help speed up requests to the database. Definitely recommend enabling that if you have it.
2. Use the latest version of PHP
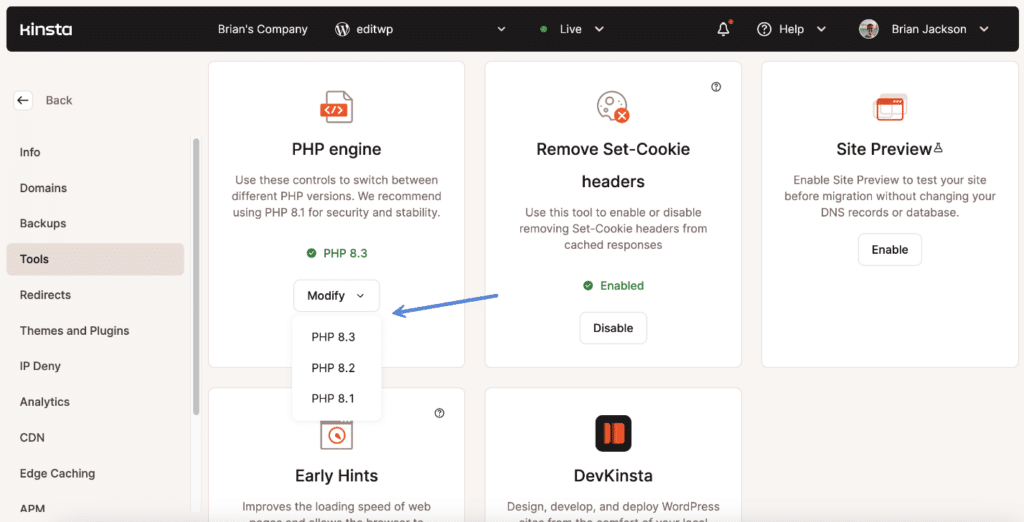
It’s always recommended to use the latest supported version of PHP. Each version gets performance and security improvements (see supported versions). While the boost might be marginal, it’s one of the easiest updates you can make, impacting both back-end and front-end performance.
Many hosting providers have an easy way to change the version of PHP you’re using. It’s usually just a single click. And, of course, you’ll want to make sure to test everything, as sometimes plugin and theme developers lag behind the latest version.
3. Track down bottlenecks
The WordPress admin dashboard can sometimes be tricky in tracking down where the performance bottlenecks are coming from. However, there are some great plugins and services to help make this a little easier.
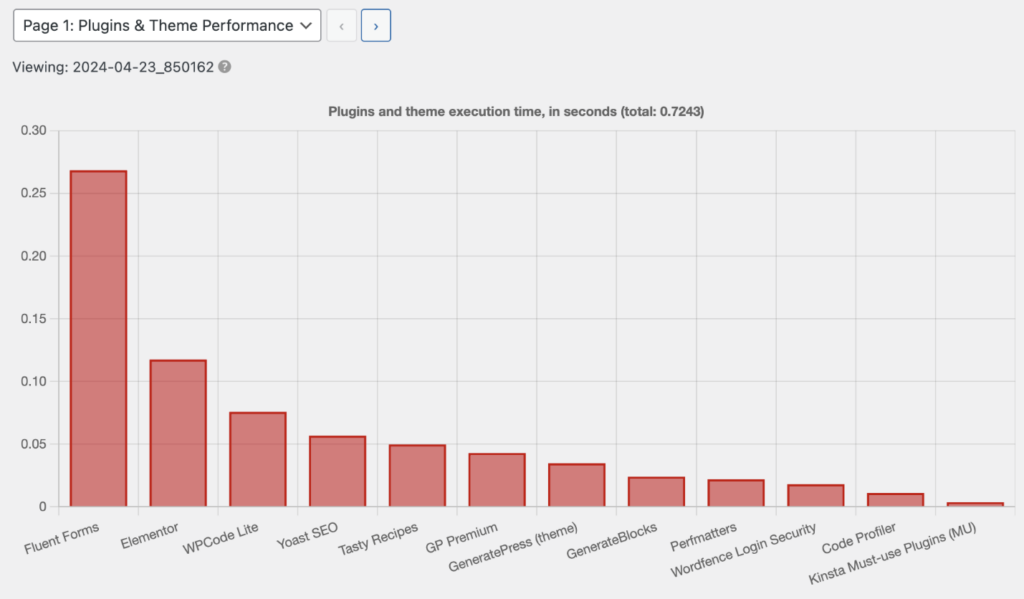
The first plugin we really like is the free Code Profiler plugin. You can scan your site (backend, admin, frontend, etc.) and see if you can spot a plugin or theme that might be slowing things down. It has easy-to-understand charts. They also have a pro version version where you can dive even deeper into database queries performance, scripts performance profiling, etc.
Another good option is the free Query Monitor plugin, although this one requires a little more technical expertise. You can measure database queries, HTTP API calls, Ajax calls, REST API calls, and more. It’s also handy for checking your memory usage.

Lastly, another option would be to use an Application Performance Monitoring (APM) tool. These allow you to track and analyze slow transactions, database queries, external requests, and WordPress plugins and hooks. Some hosting providers, like Kinsta, have their own APM tool, or they might integrate with a product like New Relic.
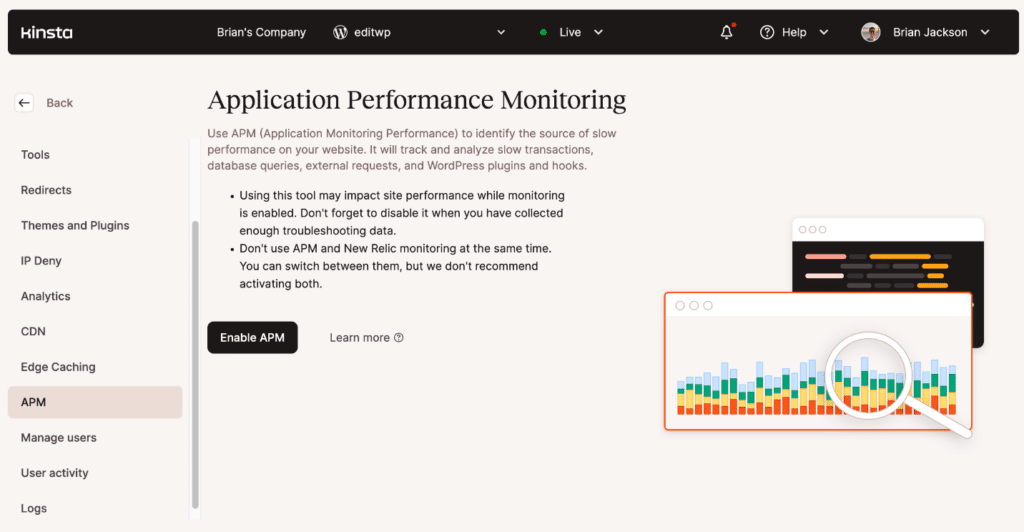
The advantage of most APM tools over a plugin is that they are not on-demand tests. You enable it and let it run for an extended period of time, which gives you a better overview of your entire site’s performance.
4. Traffic optimization
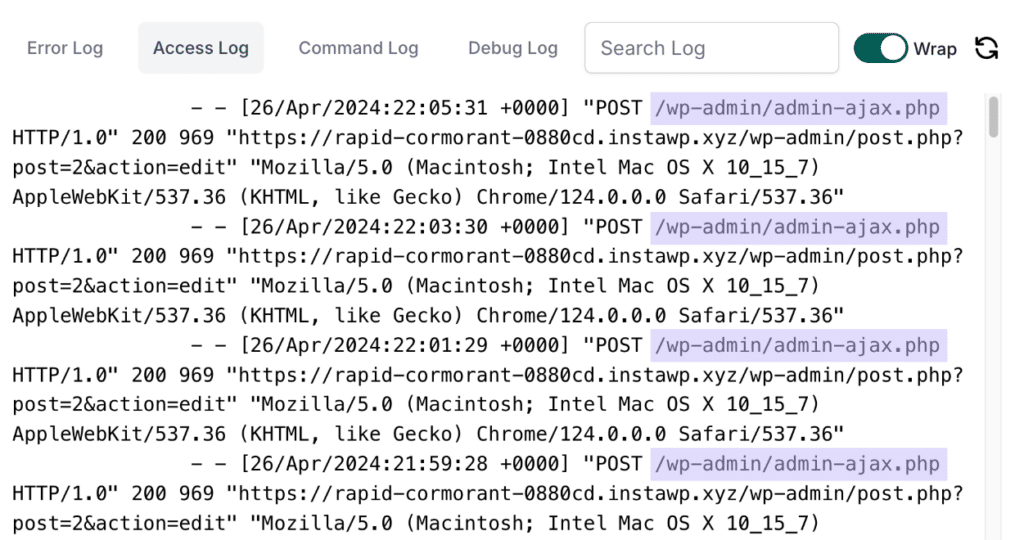
Not all traffic in the WordPress admin dashboard is optimized out of the box. For example, the WordPress Heartbeat API uses /wp-admin/admin-ajax.php to run AJAX calls from the web browser. While this is handy, it can cause high CPU usage and crazy amounts of PHP calls. For example, if you leave your dashboard open it will keep sending POST requests to this file on a regular interval, every 15 seconds.
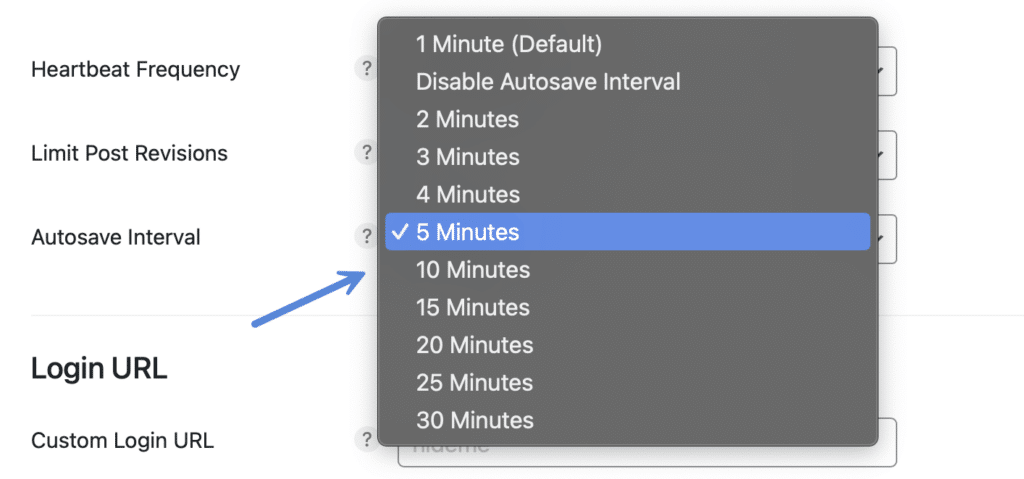
We have two features in our Perfmatters plugin that allows you to both change the frequency of Heartbeat and disable Heartbeat in different locations.
We also recommend that you increase your autosave interval.
5. Database optimization
Important: Whenever making changes to your database, always take a backup first.
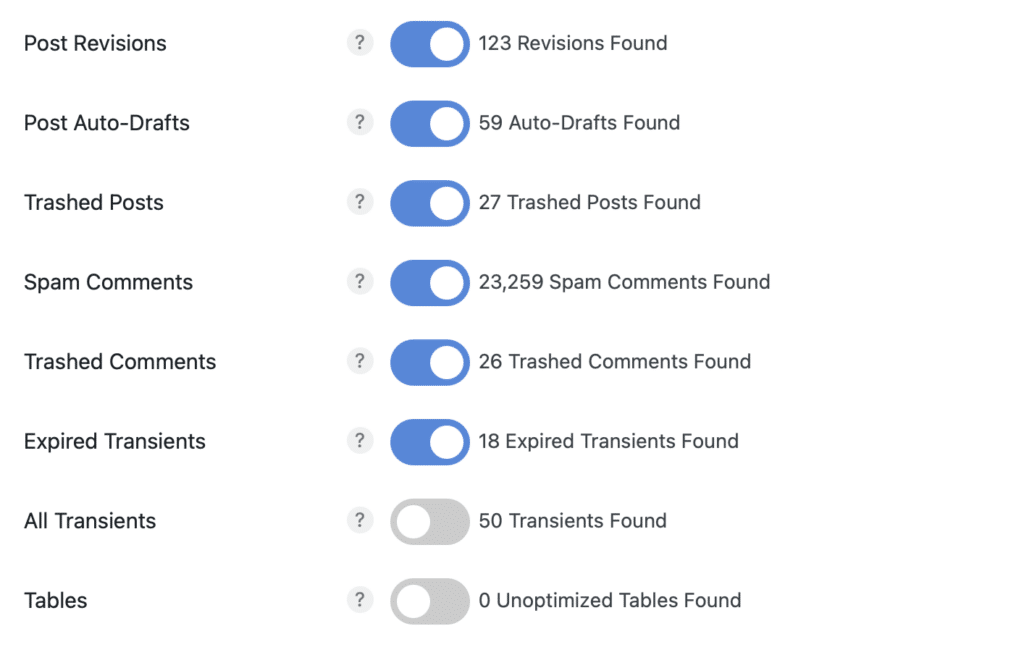
Even though WordPress databases are designed to handle large amounts of data, optimization can still help speed things up. Especially when it pertains to certain areas in your WordPress admin dashboard, such as pages, posts, comments, etc.
Database optimization is always recommended. Take advantage of our database optimization features in Perfmatters
If you’re running WooCommerce and installed it before October 2023, you might not have high-performance order storage enabled. We recommend testing and enabling that if you haven’t already.
You can also optimize your database in other ways, such as adding high-performance keys to the tables with the slowest operations. A free plugin like Index WP MySQL For Speed can help you do this.
6. Limit post revisions
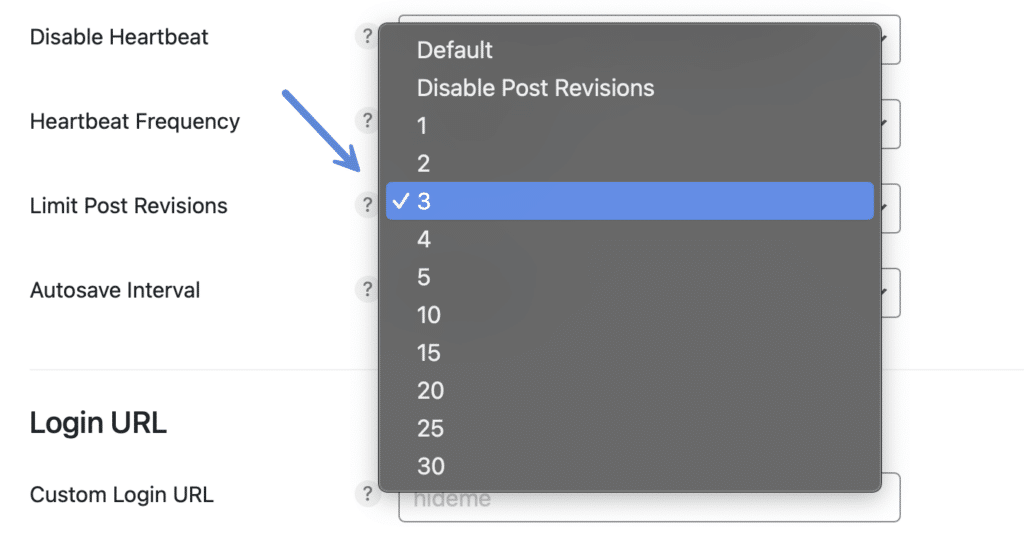
WordPress automatically saves revisions when you are working on posts and pages. These can begin to add up pretty quickly. By default, there is no limit in place. We have seen posts with over 1,000 revisions. Multiply this by 100 posts, and you have 100,000 revisions.
We recommend setting a limit on how many post revisions you keep. Or you could even disable them altogether. You can limit and disable post revisions in Perfmatters.
7. Clean up wp_options table
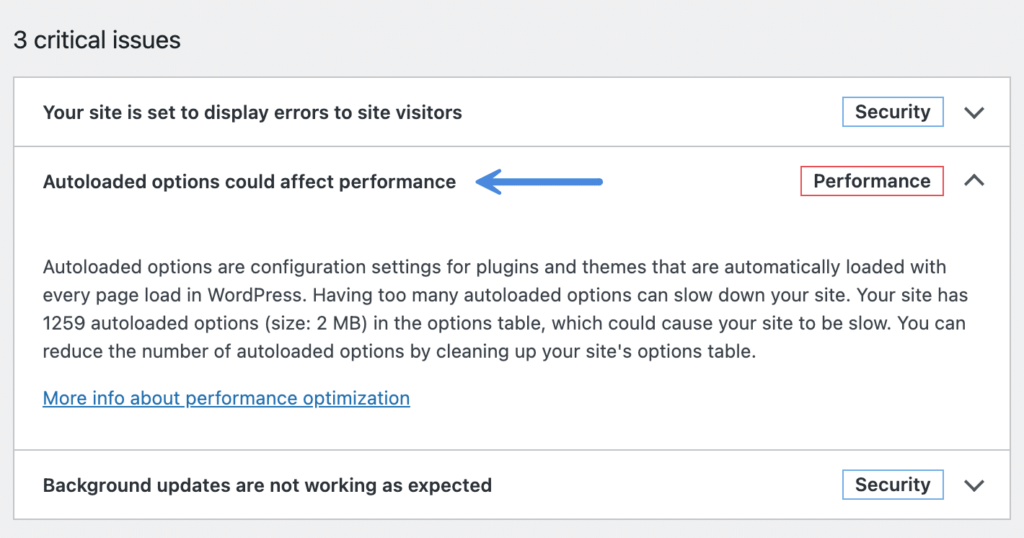
Autoloaded data is a field that accumulates in your wp_options table. When you install new plugins, change to a new theme, etc., all of this can leave behind data in this table. Over time, this can quickly bring a WordPress site to a crawl because its loaded on every page of your site. It’s healthy to keep this field’s total size below 800 KB.
There are a couple of different ways to check the size of the autoloaded data on your site. The first is using the Site Health report under “Tools.” This is part of WordPress core.
The second way to check is to open phpMyAdmin from your hosting provider’s control panel and use the following query:
SELECT SUM(LENGTH(option_value)) as autoload_size FROM wp_options WHERE autoload='yes';If you see that you do have a problem, you can use a free plugin like AAA Option Optimizer from Joost de Valk to clean this up.
- Always take a backup/restore point.
- Use the “Source” dropdown to start with things that have an identification and you’re no longer using.
- Use search/filtering extensively for similar option names. example
_mts_ - Search “theme” to see if there are a bunch of old themes you haven’t properly removed.
- Unsure of something? Google option names. Many times they’ll pop up in WordPress threads or Stack Overflow.
Below is an example of the results we achieved using AAA Option Optimizer on a large and old WordPress site:
- Autoloaded options decreased by 65.72%.
- Autoloaded size decreased by 78.87%.
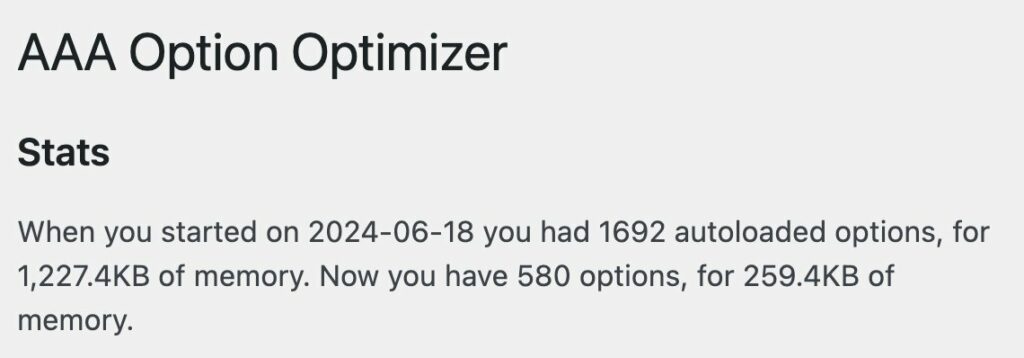
Note: We don’t typically recommend leaving AAA Option Optimizer activated after you’re done cleaning things up.
8. Clean up old plugins
If you have a WordPress site that has been around for a while, you most likely have a lot of data left behind (tables, files) from old plugins.
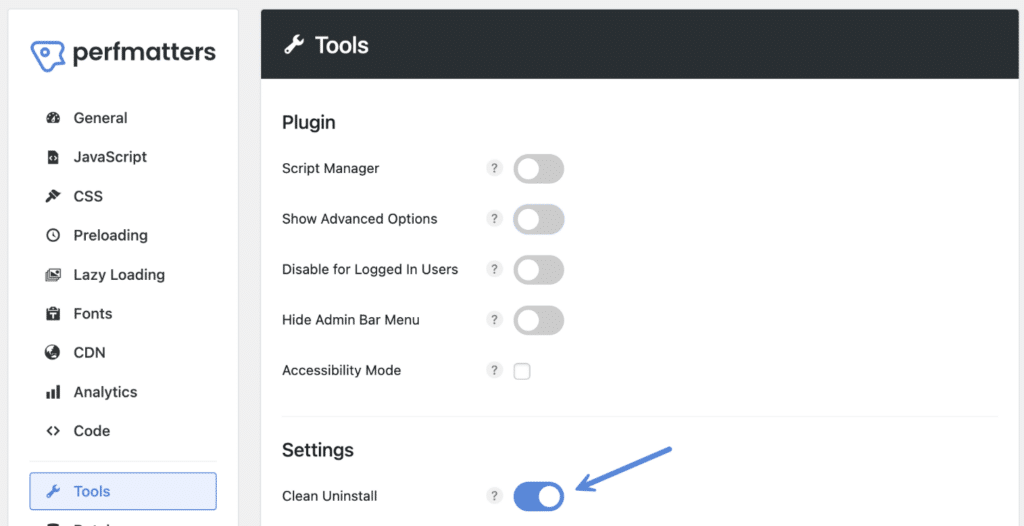
Clean Uninstall
Well-coded plugins have a “clean uninstall” option these days. You can check your tables in your database. If you see a plugin you no longer have running, check their documentation to see if they have a “clean uninstall” option. Then temporarily install the plugin again and run the uninstaller the proper way.
Manually remove tables
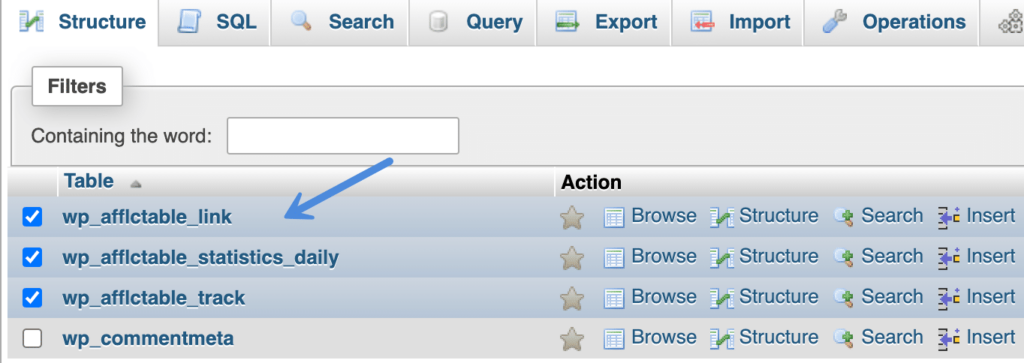
The last resort would be to manually delete the database tables and files. In this example, we’re removing the Affiliate Link Cloaker plugin’s tables.
Step 1
Log in to phpMyAdmin at your host and look for the tables.
Step 2
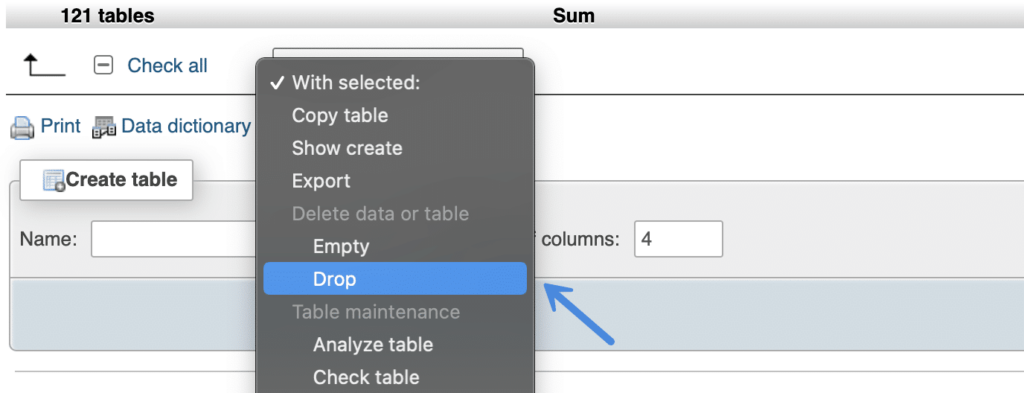
Select the tables and at the bottom click on “Drop” from the drop-down menu.
Step 3
Click “Go” on the confirmation.

9. Disable default WordPress CRON
WP-CRON is a task scheduler for WordPress. The problem is that it checks the list of scheduled tasks that need to run on every page load. On high-traffic sites, this can quickly become a performance issue. Thankfully, you can disable WP-CRON and instead use a server-level (system) cron.
Note: We don’t recommend this for every WordPress site. But if you see high cron activity and you think it might be slowing down your site, it’s a good thing to try.
To disable WP-CRON, add the following to your wp-config.php file, right above the line that says “That’s all, stop editing! Happy blogging.”
define('DISABLE_WP_CRON', true);After it’s disabled, you will have to call wp-cron.php from your server or a third-party service to ensure scheduled tasks still fire off properly on your WordPress site. The benefit is that you can have it run on a schedule, instead of all the time.
If you’re hosting with a provider like Kinsta, and have WP-CRON disabled, their server-side cron triggers wp-cron.php every 15 minutes automatically. No extra setup is necessary.
For more information, Tom Mcfarlin has a good article on how to properly set up WordPress cron jobs.
10. Decrease disk usage
Another great thing to do is to simply decrease your total disk space usage. We’ve found that on a lot of our sites we have tons of unused images sitting there over time. Mainly from articles where we’ve updated and replaced images and never removed the original ones.
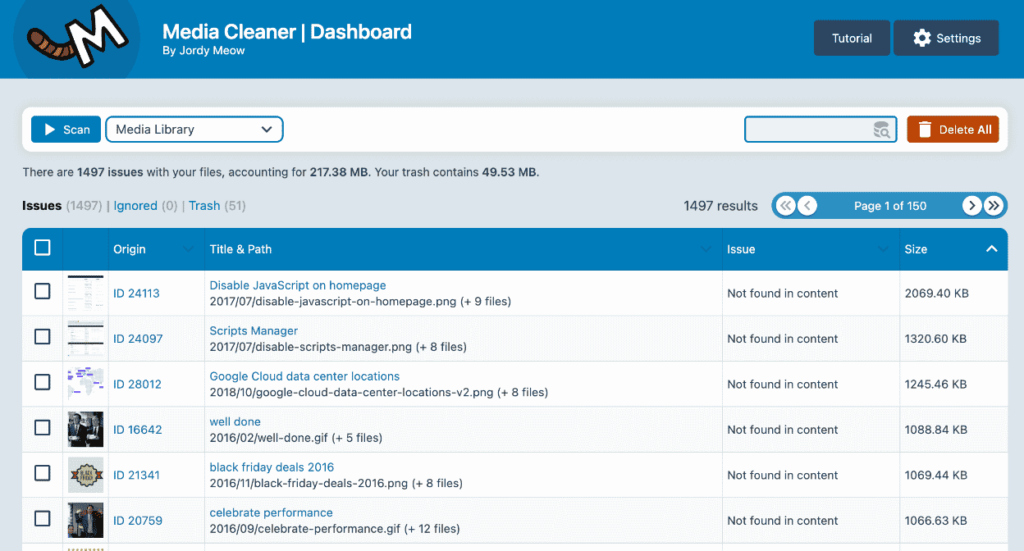
We recommend using the Media Cleaner plugin. This helps clean up your media library from the entries (and files) which aren’t used on your WordPress site.
Another thing to watch out for is if you’ve previously migrated from one image optimization plugin to another. Some use different file extensions. For example, if you migrated over from Imagify to ShortPixel, you might have leftover images with a .jpg.webp and .png.webp extensions sitting in your site’s uploads folder. This can easily account for hundreds if not thousands of additional images.
You can use a script or connect to your site via SFTP and do a quick search for these extensions and delete them. Make sure to check with your current image optimization solution to confirm which extensions they are using.

Summary
As you can see, there are a lot of different ways you can work on improving your WordPress site’s back-end performance. Did we miss anything? If so, send us a message. We’re always trying to improve our documentation, even if it doesn’t always directly relate to our plugin.