Image optimization is one of the most important things you can do to speed up your WordPress site. And it should be one of your top priorities. According to The HTTP Archive, as of 2026, images make up on average 34% of a website’s total page weight on mobile devices. Many times, this is more than JS and CSS combined. The good news is, there many different ways you can optimize your images for mobile, desktop, and Core Web Vitals. We’ll dive into all of these below.
Lazy loading
Lazy loading is essentially delaying or deferring the loading of images until a user scrolls down the page (images enter within the viewport). This is one of the most powerful optimizations you can make on your WordPress site.
We’ve seen lazy loading easily decrease the total page by over 70%. And it fixes the “Defer offscreen images” warning on PageSpeed Insights.

When it comes to lazy loading, here are a couple of things to keep in mind:
- You don’t want to lazy load your LCP image. This will result in a “Largest Contentful Paint image was lazily loaded” warning.
- It’s always better to utilize HTML images instead of CSS background images whenever possible, as it is easier for lazy load solutions to handle.
WordPress 5.5 and higher has native lazy loading by default. However, there are many advantages to using a lazy loading solution. Check out our in-depth doc on how to use Perfmatters lazy loading.
Compress your images
Compression is a way to make your image files smaller by removing unnecessary or additional data. It’s one of the easiest ways to decrease your website’s total size, and once you have a sound system in place, it can ultimately be hands-off.
There are two main types of image compression, lossy and lossless.
Lossy compression
Lossy compression removes data from the original file, resulting in a significantly reduced file size. However, you also suffer from a little quality loss, so you don’t want to compress too much.
Lossless compression
Lossless compression means it reduces the images without any loss of quality. It rewrites the data in a different way by removing unnecessary metadata. Even if you are saving an image for the web in a tool like Affinity Designer, it can still be reduced.
With lossless, you won’t end up with the highest compression, but you will maintain the quality of your images. With lossy, you might notice a small change in quality (most of the time you won’t), but you’ll decrease the size of your images as much as possible.
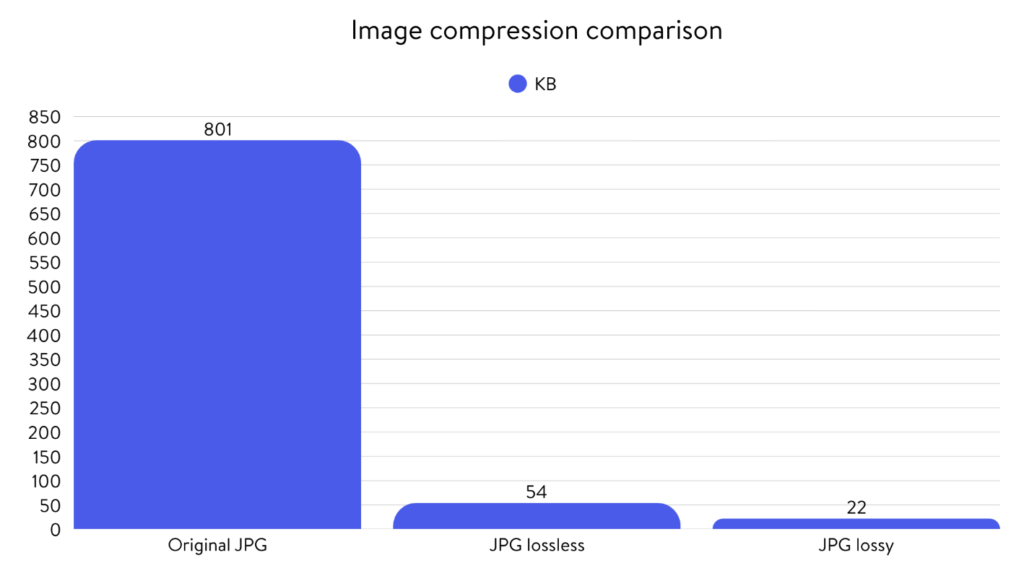
Here is an image that we compressed, and the difference in sizes based on the method used:
- Original JPG: 801 KB
- JPG after lossless compression: 54 KB (93.26% decrease in size)
- JPG after lossy compression: 22 KB (97.25% decrease in size)
We use lossy compression on all of our sites because this is an easy win for performance. However, it depends on your use case and type of site. For example, if you are a photography business, you might prefer to use lossless compression. With that being said, we always recommend trying to keep your individual images under 100 KB, especially for mobile.
Automatically compress images (plugin, CDN, hosting)
The easiest way to compress your images is to use a WordPress image compression plugin. Here are a few plugins we recommend:
- ShortPixel
- Imagify
- CompressX
- Squeeze (newer plugin powered by Google Squoosh, worth a mention)
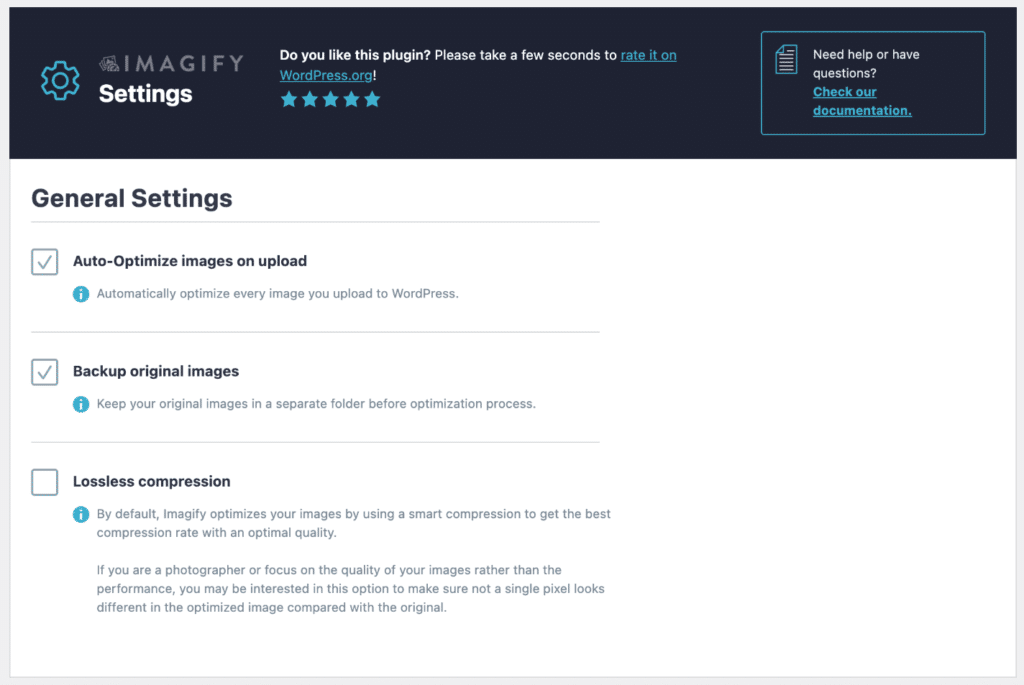
Their automatic lossy compression ensures the perfect balance between quality and size. They will optimize your images when you upload them and they have a bulk optimization feature to compress your entire media library if you haven’t already.
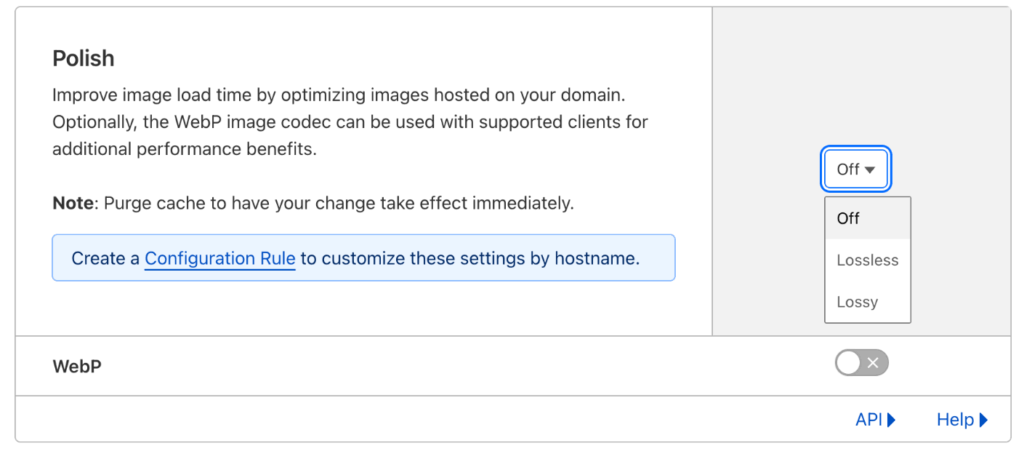
Another way to automatically compress your images is to use a CDN like Cloudflare. If you have the Pro plan with Cloudflare, you can utilize their Polish feature to compress images at the edge. It has both Lossy or Lossless options, along with the ability to convert them WebP format. However, we’ve personally seen better results with optimization plugins if you want to be a little more aggressive with your compression. The Cloudflare method definitely works, you might just end up with slightly larger images.
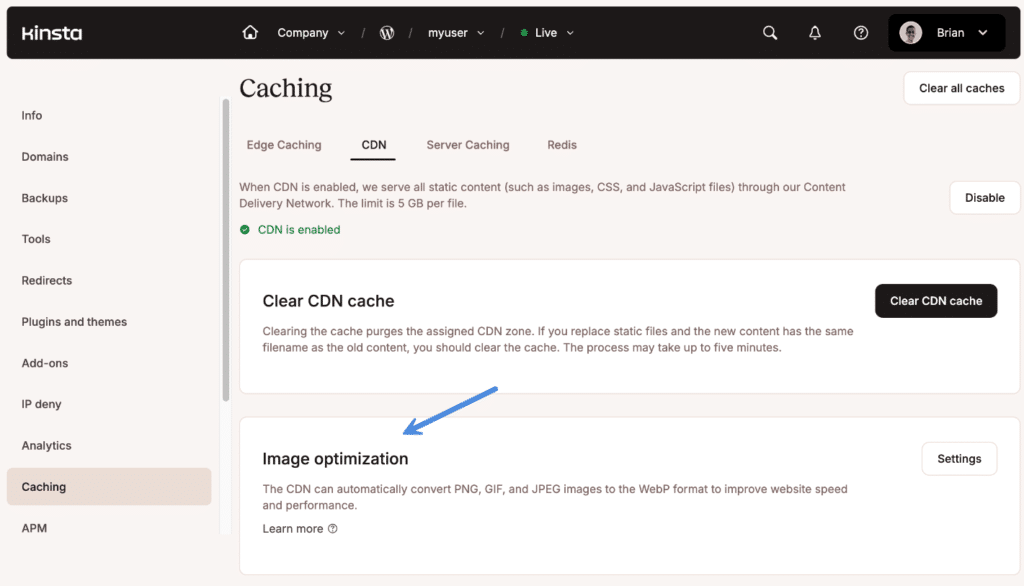
Some hosting providers like Kinsta, BigScoots, Rocket.net, and InstaWP also offer image optimization as part of their hosting plans. Many times this is done through a partnership with a CDN like Cloudflare behind the scenes, or with a third-party library. However, an optimization plugin might still be better if you need more control over the compression and image formats.
Manually compress images
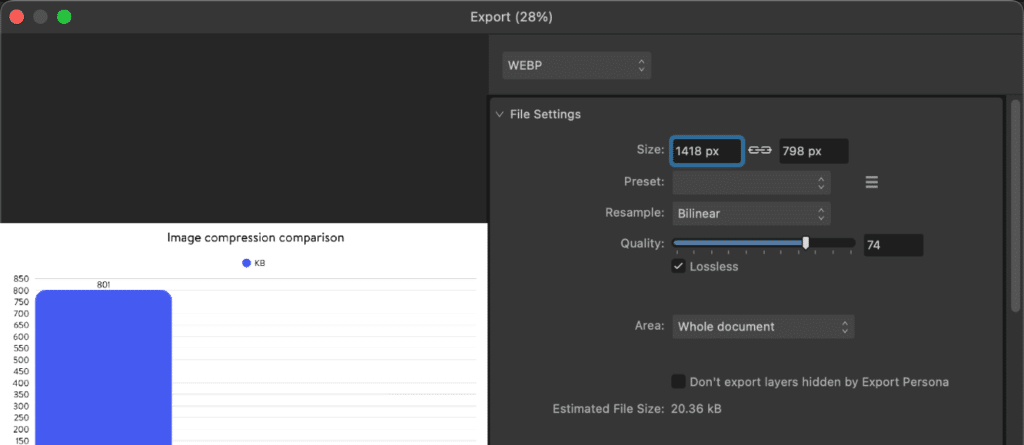
Another option would be to compress your images manually before uploading them to WordPress. There are a couple of different ways you can do this. For example, one would be to use a tool like Affinity Designer/Photo or Adobe Photoshop. All of these tools have an export or “Save for Web” feature where you can change the quality.
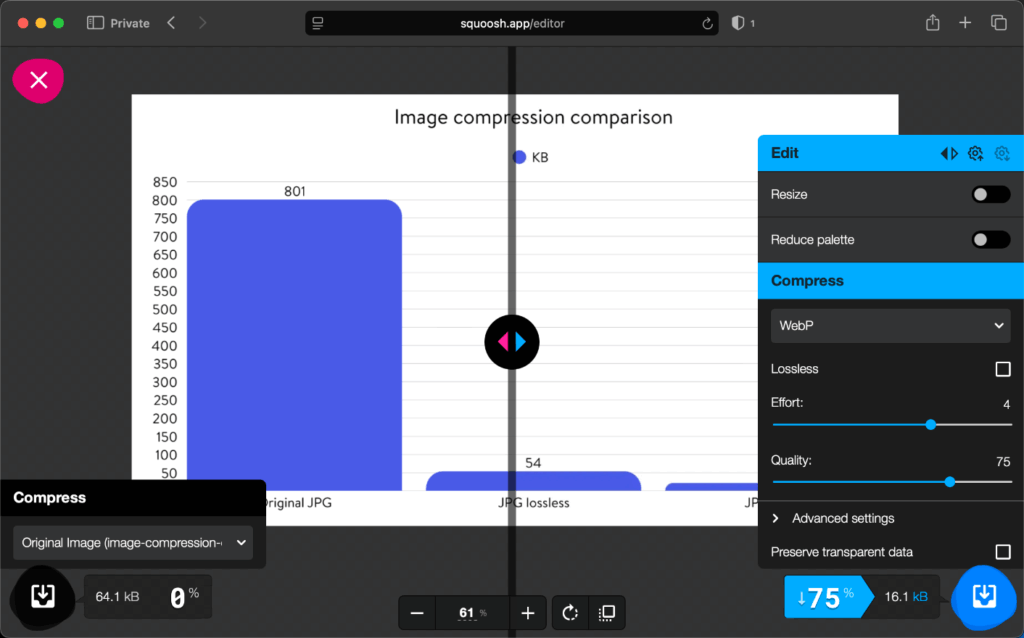
Another option we regularly use is Google’s online Squoosh tool. This can come in really handy if you need to fine-tune an image to get it under that recommended 100 KB threshold.
Utilize newer and smaller image formats
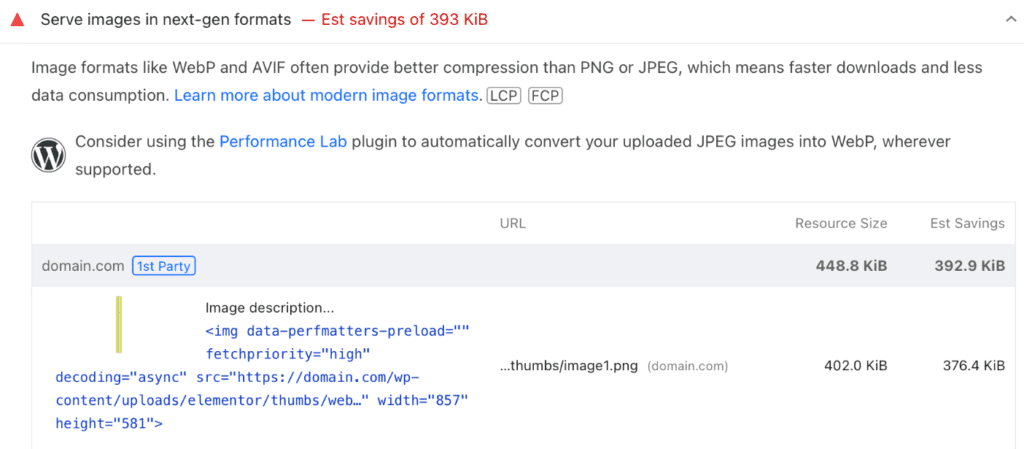
The next way to speed up your images is to utilize newer and smaller image formats such as WebP and AVIF (as opposed to the standard PNG/JPG). This is what the warning in PageSpeed Insights “Serve images in next-gen formats” is referring to. However, this warning can also be a little misleading, as it will flag regardless of the image format if it detects savings of 7 KB or more. Their goal is to simply get your images smaller, and moving to newer image format definitely helps.
Main benefits of AVIF
The first benefit of using AVIF images is obviously faster load times due to the smaller file sizes. This is mainly on images above the fold that aren’t lazy loaded (meaning a positive impact on your LCP). We ran a few comparison tests on our site and saw a 29% decrease in image sizes moving from WebP to AVIF.
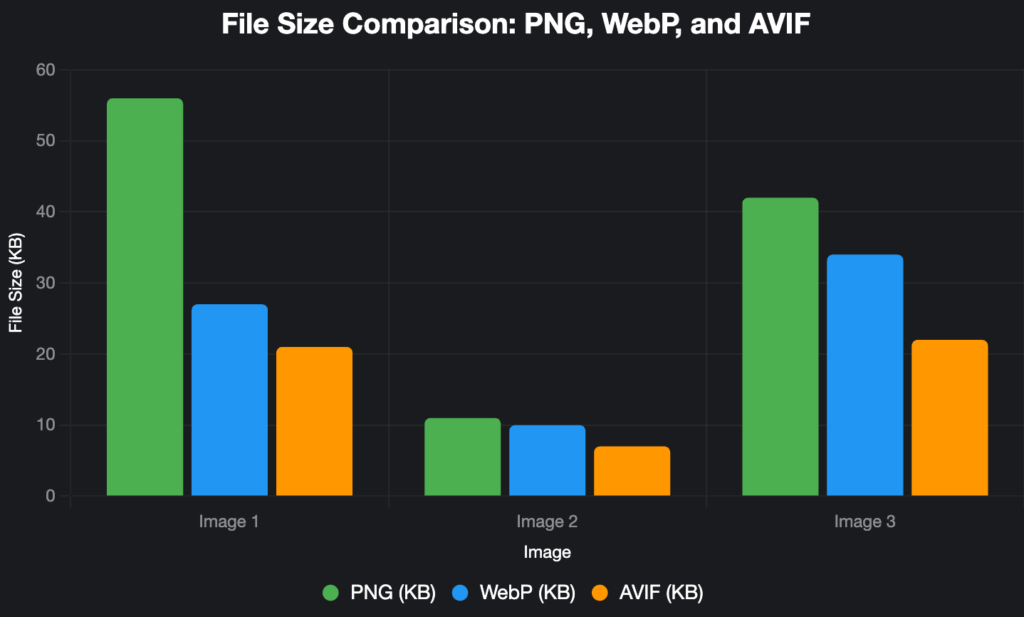
Image 1
- PNG 56 KB
- WebP 27 KB: ~52% decrease on PNG to WebP
- AVIF 21 KB: ~22% decrease on WebP to AVIF, ~63% decrease on PNG to AVIF
Image 2
- PNG 11 KB
- WebP 10 KB: ~9% decrease on PNG to WebP
- AVIF 7 KB: ~30% decrease on WebP to AVIF, ~36% decrease on PNG to AVIF
Image 3
- PNG 42 KB
- WebP 34 KB: ~19% decrease on PNG to WebP
- AVIF 22 KB: ~35% decrease on WebP to AVIF, ~48% decrease on PNG to AVIF
Second, you should see increased crawl efficiency by Google and other tools due to the smaller file sizes and faster page rendering.
Can’t you just use AVIF images directly?
In terms of browser support, it’s very similar now. WebP browser support is at ~96% while AVIF browser support is at ~95%. WordPress 6.5 and higher supports directly uploading AVIF images to the media library. However, ensure that your hosting provider has a newer version of ImageMagick running and the libavif library. Otherwise, you may encounter the following error. Most hosts shouldn’t have this issue.

Given the current state of support, you might think it would be better to just use AVIF images directly and save on disk space. The problem with that is social media (good post from Joost). For example, networks like X, LinkedIn, BlueSky, etc., don’t support AVIF yet. So if you want a preview image when sharing (which we personally do), you will still want to upload a WebP, PNG, or JPEG image as a fallback.
That’s why on our sites, we use an image optimization plugin where we upload a PNG (or WebP) and it converts it to AVIF, but uses the original as a fallback. Plugins like ShortPixel and Imagify have a method that uses a <picture> tag to automatically handle this fallback for you.
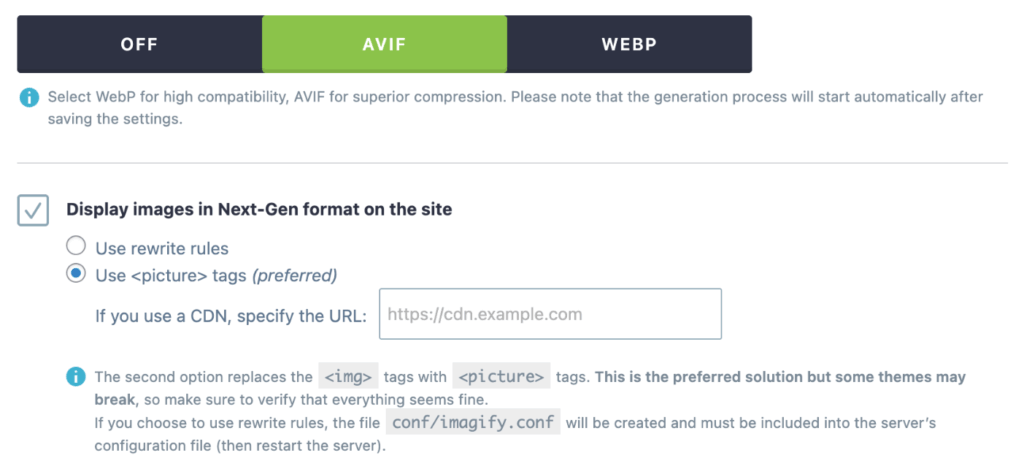
If you don’t care about social media previews, you might be able to get away with simply uploading AVIFs directly to WordPress. And the good news is that this will probably improve over time, where all social media networks will support AVIF.
Add missing image dimensions
Modern browsers set the default aspect ratio of images based on their width and height attributes. Here is a basic example:
<img src="image.png" width="340" height="160" alt="my awesome alt" />If your image is missing these attributes, it can cause layout shifts, which trigger CLS warnings in Core Web Vitals: Image elements do not have explicit width and height.

See our doc on how to add missing width and height attributes to your images.
Properly size your images for mobile and desktop
The warning from Google to properly size images is a very common one that comes up these days. This happens if an image being served by the browser is bigger than its container.

WordPress supports responsive images with srcset out of the box. However, themes and plugins like WooCommerce might want a different sized image than you already have defined in WordPress.
For example, perhaps you have an archive page with containers expecting images that are 250 px by 250 px. But the images you have uploaded in your media library are 500 px by 500 px.
See our doc on how to fix the properly size images warning.
Utilize a content delivery network (CDN)
If you’re targeting visitors across the globe, we always recommend using a Content Delivery Network (CDN) to serve your images.
No matter how fast your server is, you can never beat the network latency issue. It’s basic math. Your images are stored physically on a server in a data center, and things get slower for users the further away they are, as it has to download the images over a great distance.
A content delivery network (CDN) fixes that by storing copies of your images on edge servers around the globe. It also caches them. When a visitor looks up your website, the content is delivered from the closest geographical edge server (cache) instead of your web server.
How much does a CDN help? We’ve seen a CDN increase the speeds of images by up to 68%! Remember, a lot of it will depend on the physical distance. You should see drastic differences at locations further away.
We recommend one of the following CDNs:
- Cloudflare
- QUIC.cloud (if you’re using LiteSpeed)
- KeyCDN
- bunny.net
We also recommend increasing the cache expiration time (TTL) on your images. Longer cache times lead to faster download times and better cache HIT ratios.
For example, with Cloudflare, you can change this from their dashboard. Under the “Caching” tab, click on the “Configuration” tab. Set the “Browser Cache TTL” to something higher. We typically recommend 1 month.

Use preload and fetch priority for images above the fold images
Preload and fetch priority are two different attributes you can use to speed up images above the fold.
Preloading leading images (those above the fold) can help decrease Largest Contentful Paint (LCP) times in Core Web Vitals. These are typically images like a logo, a featured image on a blog post, a hero image on a landing page, etc. By preloading them, you’re moving them to the top of the waterfall and essentially telling the browser that these have priority and should be loaded right away.
You can also take that a step further and add the fetchpriority="high" attribute to the featured image or any resource to prioritize it in the browser.
Check out our docs on how to utilize both of these attributes in Perfmatters to speed up your images:
- How to preload images
- How to use fetch priority
- How to preload critical images automatically (and add fetch priority)
Inline SVG code versus files (pros and cons)
There are some performance advantages to using files (SVG images) versus inline SVG code.
The first is that you can lazy load the SVG images. The HTML for the image will be around one line of code, and then the rest is completely lazy loaded until you scroll down. Whereas with inline SVG code, the browser has to parse the entire code on every page load. This leads to greater download/parsing time, a bigger page, which can lead to higher FCP/LCP.
Another advantage is when you have multiples of the same image. If you have it with inline SVG code, the browser has to parse all the code (even duplicate code). If you have two images that are the same, the browser is smart enough to only load the image once and parse it once.
Also, you can usually cache images a lot longer than the pages are cached.
If you have the ability to change all of your SVG code, you could take advantage of the <use> attribute to only load SVG code once, even if it’s used multiple times on the page.
Optimize SVG images
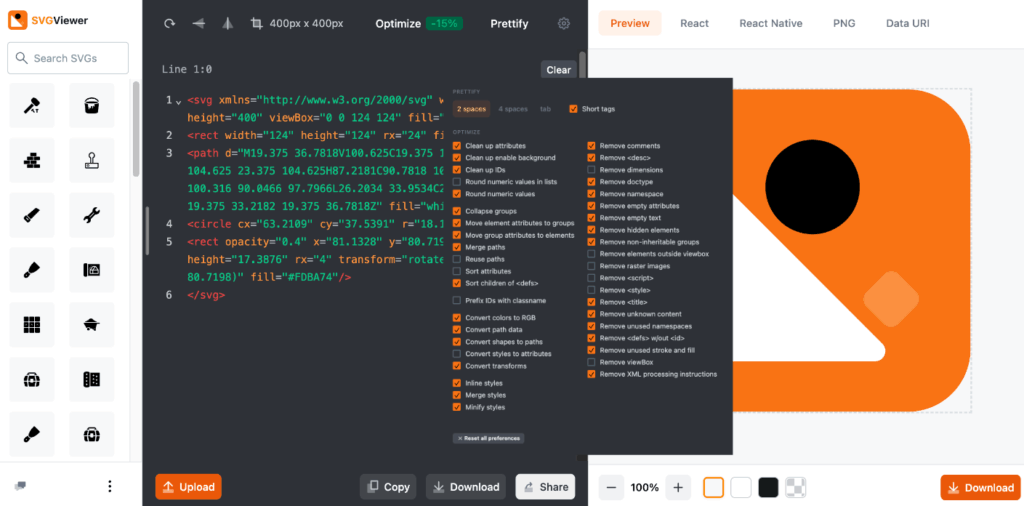
Many image optimization plugins and CDNs don’t typically compress or deal with SVG images. We recommend using a third-party tool like SVGViewer or SVGOMG. You can one-click optimize them, change dimensions, strip out unnecessary data, edit code, etc., all while live previewing the results. In our experiences, we’ve seen between 10-20% reductions in SVG file sizes, which really adds up.
